
Boto3 is a powerful Python-based SDK (Software Development Kit) designed to simplify the management of various AWS (Amazon Web Services) cloud resources. With Boto3, developers can easily access and manage AWS services, reducing the time and effort required for cloud application development and management. Its intuitive interface and extensive documentation make it a popular choice among developers working with AWS.
This tutorial will cover how Boto3 manages S3, DynamoDB, and SQS. S3 is a huge digital storage locker for photos, movies, and documents. It is highly reliable, scalable, and affordable. DynamoDB is an excellent NoSQL database with lightning-fast speed. It’s ideal for applications requiring a versatile, scalable, and dependable database. SQS, a message queuing service, helps decouple and scale applications. It lets components transmit, store, and receive messages without losing data.
Boto3 simplifies the management of AWS cloud services by streamlining various tasks. It allows developers to efficiently manage S3 buckets, read and write data from DynamoDB tables, and send and receive SQS messages with just a few lines of code.
By automating these tasks, Boto3 helps to avoid the potential for errors that may arise from manual intervention.
Today, we will provide step-by-step instructions on how to use Boto3 to manage S3, and SQS. Let’s start with the installation and configuration of Boto3.
Installation and Configuration
Installing Boto3
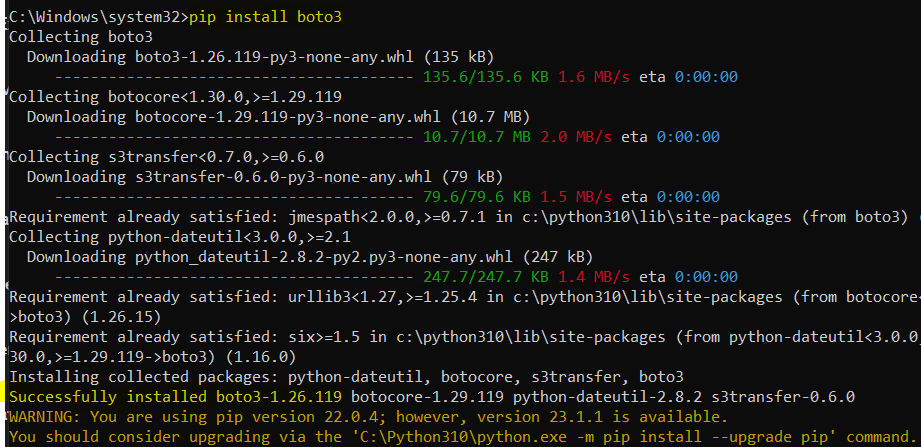
Installing Boto3 is very easy. Just run the below command after installing Python and pip (Python package manager) on the system.
pip install boto3
Configuring AWS Credentials
To configure the AWS credentials, you will first need to set up an IAM user that has access to S3, DynamoDB, and SQS. After granting access to these services, we will configure the credentials of that IAM user to use Boto3. The best way to configure AWS credentials is using AWS CLI. Here is the link to install the CLI tool https://aws.amazon.com/cli/
Let’s first configure the IAM user by following the below steps:
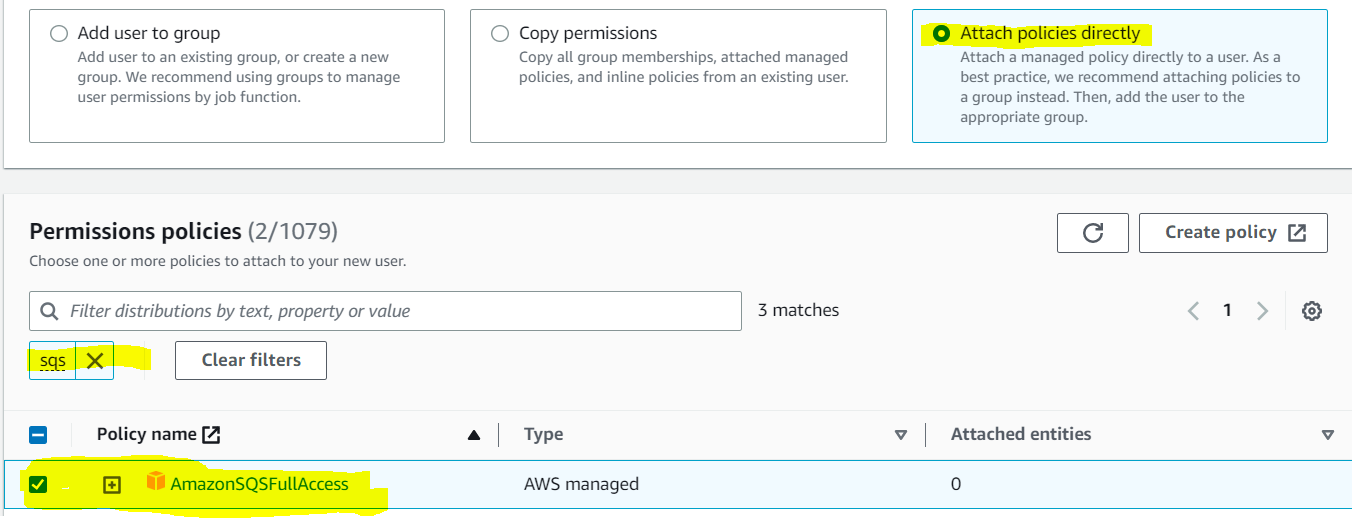
Create a new IAM user and give it access to S3, SQS, and DynamoDB. You should choose the option of “Attach policies directly” when creating the IAM user.

After attaching policy S3 as shown above, attach policies for SQS and DynamoDB.

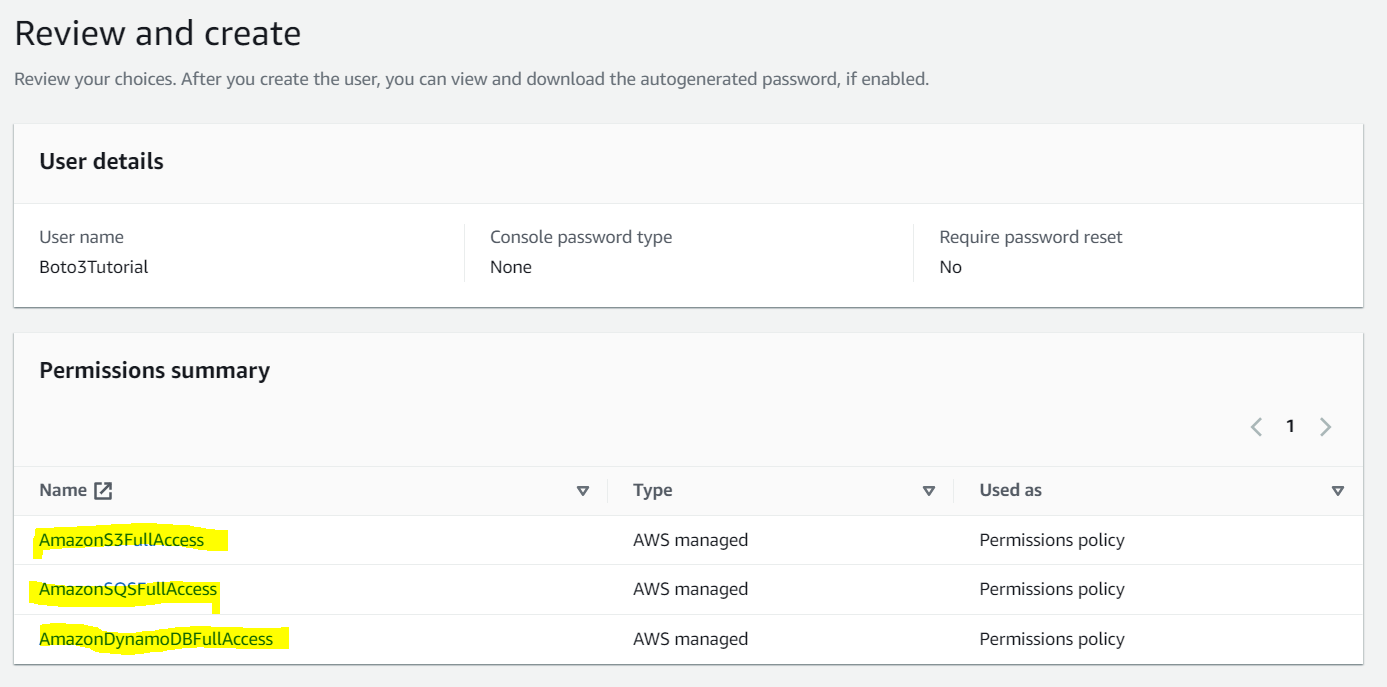
The review policy screen displays the level of access granted to these three services, as shown below:
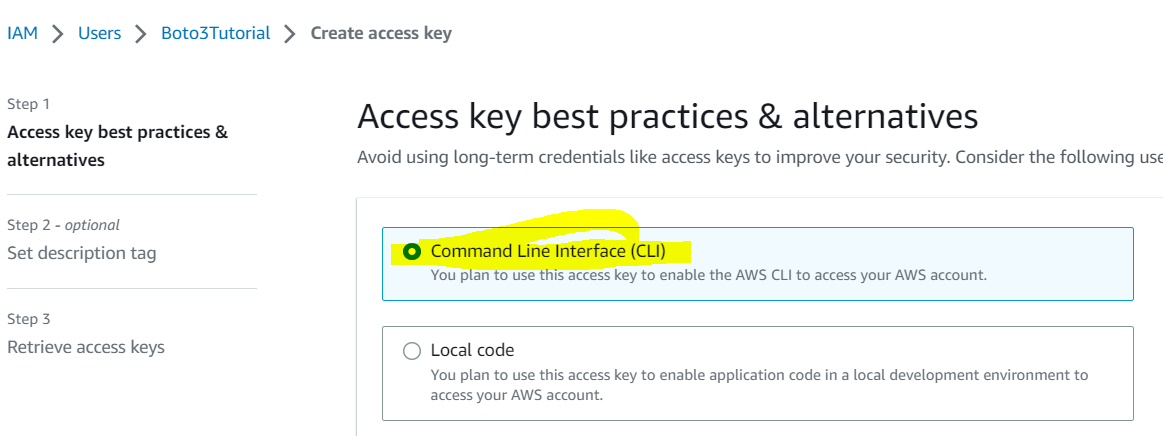
After successfully creating the user, go to the “Security credentials” section of that user in IAM and click on “Create Access Key” and select “CLI” as shown below:
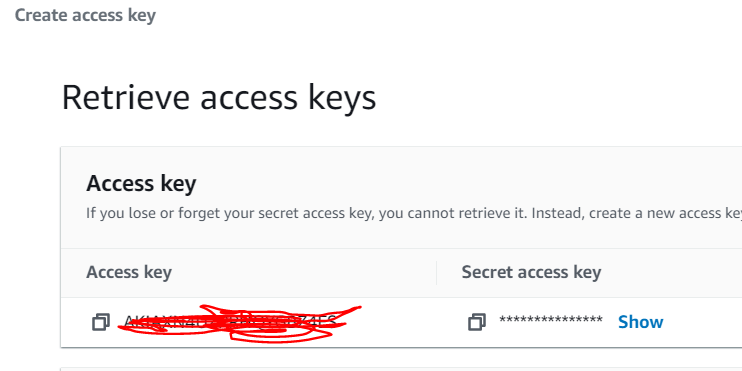
In the next step, create the keys. You can provide tags as an optional step. On the last screen, you will be shown the access key and secret key, just copy both and save them in a safe place. It’s important to note that the secret access key is only displayed once and cannot be accessed again after leaving the screen.
Now that the IAM user and keys are set, let’s use the AWS CLI tool to configure the credentials.
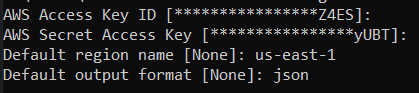
Go to the command prompt in windows and type the below command:
AWS configure
At the prompt, provide both keys one by one. First, enter the access key, and then enter the secret key. You will also be asked to enter the default AWS region and default output format like json, or xml.
Great, you have successfully configured the AWS credentials. Now you can issue Boto3 commands or scripts from the CLI. Let’s try a sample configuration with a simple script.
Description of how to test the configuration with a sample script
Here is a sample script with inline comments to explain each line:
import boto3
# Test S3
s3 = boto3.resource(‘s3’) # It creates an S3 resource object to access your S3 buckets and objects.
for bucket in s3.buckets.all(): # Fetch all buckets
print(bucket.name) # print name of each bucket in loop
# Test DynamoDB
dynamodb = boto3.resource(‘dynamodb’) # It creates an DynamoDB resource your DynamoDB tables and its items.
for table in dynamodb.tables.all(): # Fetch all tables
print(table.name) # print name of each table in loop
# Test SQS
sqs = boto3.resource(‘sqs’) # It creates an SQS resource object to access your queues and its messages.
for queue in sqs.queues.all(): # Fetch all queues
print(queue.url) # print name of each queue in loop
Save the above script in a file. For this example, we have saved this in file named “boto.py”.
If Boto3 is not already installed on your system, then install it through the below command. Note that Python should already be installed on your system.
Pip install boto3
Now it is time to execute the script. Just go to the directory where you had placed the python script in the previous step. Now execute the script by typing the below command:
Python boto.py # You can replace boto.py with your own script name here

As you can see, the script has successfully fetched the S3 bucket, DynamoDB table and one queue that exists in the current AWS account.
Accessing AWS Services with Boto3
How to interact with S3 using Boto3
The below code created the boto3 object for interacting with S3 buckets. Using this object, you can perform different operations on buckets.
s3 = boto3.resource(‘s3’)
How to create or delete objects in S3 using Boto3
The below script will add a new file in the S3 bucket of your choice.
# Set your bucket name and the file path
bucket_name = ‘your-bucket-name’
file_path = ‘local/path/to/your/file.txt’
key = ‘destination/key/on/s3.txt’
# Upload the file mentioned in above file path to the bucket you specified above
response = s3_client.upload_file(file_path, bucket_name, key)
# If the upload is successful, the response will be None
if response is None:
print(f”File ” successfully uploaded to ” with key ”.”)
else:
print(“Failed to upload file.”)
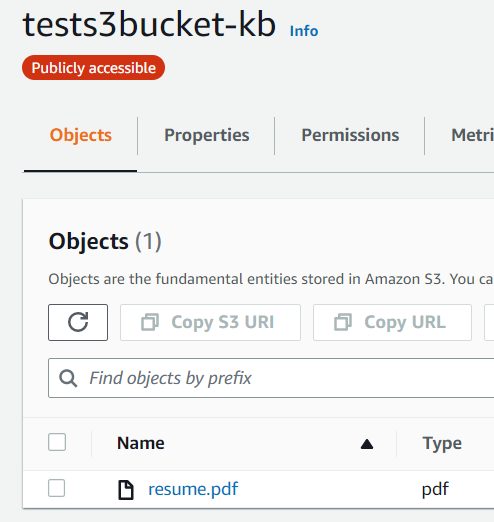
In the above code snippet, replace the bucket name, file path, and the key of your own choice. When inserting the above code and providing a file named “resume.pdf”, the file is successfully uploaded as shown below.
Similarly, removing an object is easy as well. Let’s delete the same file “resume.pdf” using the below code:
bucket_name = ‘tests3bucket-kb’ # bucket name
key = ‘resume.pdf’ # key name
s3_client = boto3.client(‘s3’) # create boto client for s3
# Delete the object from the specified S3 bucket
response = s3_client.delete_object(Bucket=bucket_name, Key=key)
# Check the response status code for successful deletion
if response[‘ResponseMetadata’][‘HTTPStatusCode’] == 204:
print(f”Object with key ” successfully deleted from ”.”)
else:
print(“Failed to delete object.”)
Let’s try the delete script and see the results:

Congratulations, we have successfully deleted the object from S3 using Boto3.
How to interact with DynamoDB using Boto3
Similar to S3, you need to create Boto3 object for DynamoDB using the below command:
dynamodb = boto3.resource(‘dynamodb’) # It creates an DynamoDB resource your DynamoDB tables and its items.
You can perform different operations using the Boto3 object “dynamodb” created in the above step.
How to add, read, and delete items in DynamoDB using Boto3
Let’s explore how to add an item in the DynamoDB table. Note that we already have a table named “Boto3TestTable”. Let’s add an item in this table using below script:
# Set the table name
table_name = ‘Boto3TestTable’
# Specify the item to be inserted
item = {
‘mypk’: ‘val1’, # note that we mentioned mypk as the primary key so must provide its value
‘attribute1’: ‘value1’,
‘attribute2’: ‘value2’
}
# Get the table object
table = dynamodb.Table(table_name)
# Put the item into the table
response = table.put_item(Item=item)
# Check if the operation was successful
if response[‘ResponseMetadata’][‘HTTPStatusCode’] == 200:
print(f”Item inserted successfully in ”.”)
else:
print(“Failed to insert item.”)
You can see the item is successfully added into the table.

Reading the same item is super easy. Just use the below code to read an item.
# Set the table name
table_name = ‘Boto3TestTable’
# Specify the item to be inserted
pkkey = { # We named it pkkey, it will be referenced in next lines
‘mypk’: ‘val1’, # Remember we had added the item with val1 as the key value
}
# Get the table object
table = dynamodb.Table(table_name)
# Get the item from the table
response = table.get_item(Key=pkkey)
# Check if the operation was successful
if response[‘ResponseMetadata’][‘HTTPStatusCode’] == 200 and ‘Item’ in response:
item = response[‘Item’]
print(f”Item found: “)
else:
print(“Failed to fetch item or item not found.”)
Let’s execute this script and see the result:

As you can see, the item was found and its content was displayed as well.
How to interact with SQS using Boto3
The below code creates the Boto3 object for SQS and you can perform different operations using this object.
How to send and receive messages using SQS and Boto3
Let’s go through the below code to send the message to an SQS queue:
# Create an SQS client
sqs = boto3.client(‘sqs’)
# Set the queue URL, we have replace it with our the URL of our own queue
queue_url = ‘https://sqs.us-east-1.amazonaws.com/510876290127/Boto3TestQueue’
# Set the message to be sent
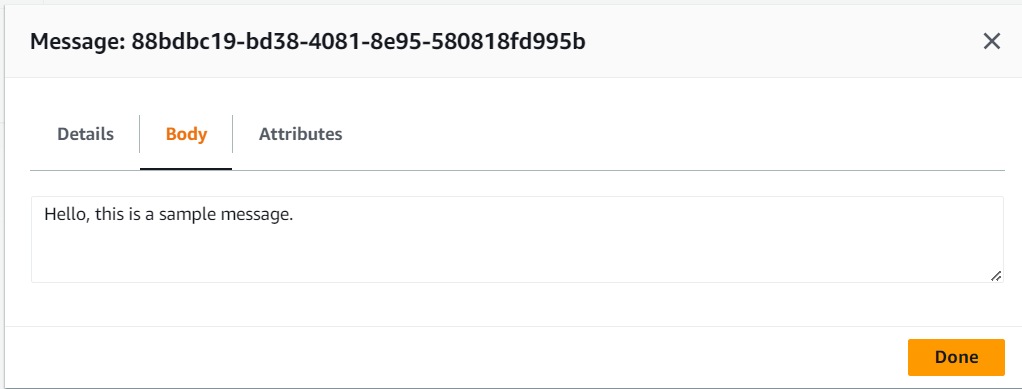
message = ‘Hello, this is a sample message.’
# Execute the send_message command as below
response = sqs.send_message(QueueUrl=queue_url, MessageBody=message)
# Check if the operation was successful
if response[‘ResponseMetadata’][‘HTTPStatusCode’] == 200:
print(“Message sent successfully.”)
else:
print(“Failed to send message.”)
The above code is very easy to understand, the only thing which we replaced in the above code is the URL of our SQS queue. Let’s put the above code in the same python script file (boto.py) and see the result of the execution:

Success! You can see the message was successfully sent. If you go to the AWS console, you can view this message in SQS.
Note that all the examples in this tutorial are using the same script for different services. In the single script, we can interact and manage S3, SQS, and DynamoDB.
Conclusion
Boto3 is a highly powerful Python tool designed for managing AWS resources. Its intuitive interface and comprehensive documentation make it easy to start automating your cloud infrastructure. By following the provided instructions, screenshots, and guide, you can start managing your S3 buckets, SQS queues, and DynamoDB tables with Boto3. It’s essential to remember to safeguard your AWS credentials and use Boto3 responsibly to ensure the security and reliability of your applications. You’ll then be well on your way to developing scalable and automated cloud applications.
Ready to Take Your Tech Career to the Next Level?
At Digital Cloud Training, we’re dedicated to your success. Our courses offer up-to-date content, equipping you with the expertise to stand out in the competitive tech job market.
Our On-Demand Training allows you to learn at your own pace, fitting seamlessly into your schedule. Dive into the world of cloud computing whenever and wherever suits you best.
But we don’t stop at theory. Our Challenge Labs provide practical, real-world scenarios where you can apply your newfound knowledge without the risk of unexpected cloud costs. Gain hands-on experience and sharpen your skills.
For those seeking an immersive experience, our Cloud Mastery Bootcamp delivers live, job-ready training. Led by industry experts, this accelerated program can get you certified faster than you thought possible.
It’s time to propel your tech career forward. Join us at Digital Cloud Training and unlock your full potential in the world of cloud computing.