
In this AWS tutorial, we are going to discuss how we can make the best use of AWS services to build a highly scalable, and fault tolerant configuration of EC2 instances. The use of Load Balancers and Auto Scaling Groups falls under a number of best practices in AWS, including Performance Efficiency, Reliability and high availability.
Before we dive into this hands-on tutorial on how exactly we can build this solution, let’s have a brief recap on what an Auto Scaling group is, and what a Load balancer is.
Autoscaling group (ASG)
An Autoscaling group (ASG) is a logical grouping of instances which can scale up and scale down depending on pre-configured settings. By setting Scaling policies of your ASG, you can choose how many EC2 instances are launched and terminated based on your application’s load. You can do this based on manual, dynamic, scheduled or predictive scaling.
Elastic Load Balancer (ELB)
An Elastic Load Balancer (ELB) is a name describing a number of services within AWS designed to distribute traffic across multiple EC2 instances in order to provide enhanced scalability, availability, security and more. The particular type of Load Balancer we will be using today is an Application Load Balancer (ALB). The ALB is a Layer 7 Load Balancer designed to distribute HTTP/HTTPS traffic across multiple nodes – with added features such as TLS termination, Sticky Sessions and Complex routing configurations.
Getting Started
First of all, we open our AWS management console and head to the EC2 management console.
We scroll down on the left-hand side and select ‘Launch Templates’. A Launch Template is a configuration template which defines the settings for EC2 instances launched by the ASG.
Under Launch Templates, we will select “Create launch template”.

We specify the name ‘MyTestTemplate’ and use the same text in the description.
Under the ‘Auto Scaling guidance’ box, tick the box which says ‘Provide guidance to help me set up a template that I can use with EC2 Auto Scaling’ and scroll down to launch template contents.

When it comes to choosing our AMI (Amazon Machine Image) we can choose the Amazon Linux 2 under ‘Quick Start’.
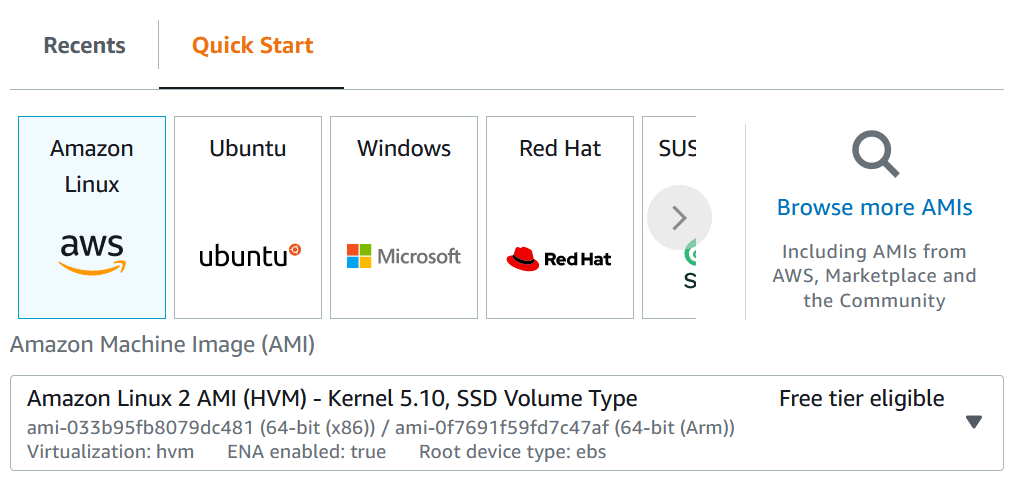
The Amazon Linux 2 AMI is free tier eligible, and easy to use for our demonstration purposes.
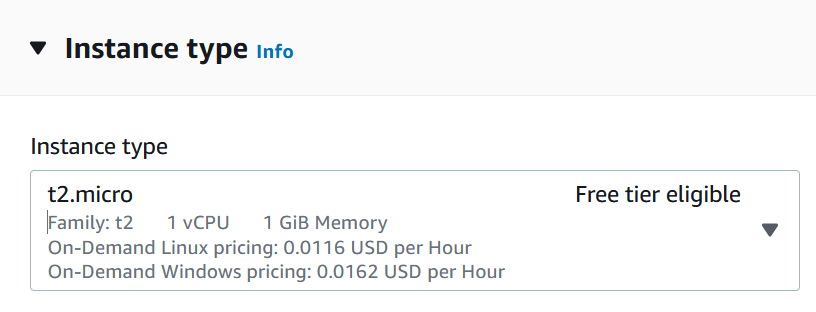
Next, we select the ‘t2.micro’ under instance types, as this is also free tier eligible.
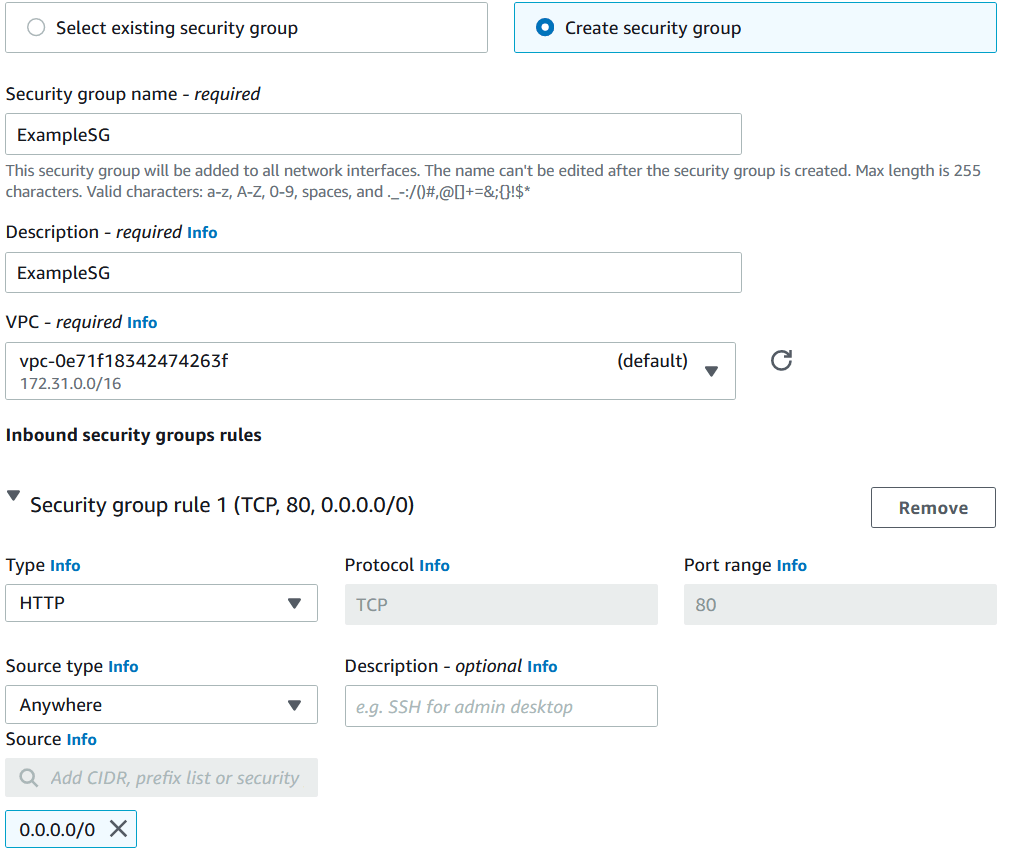
Under Network Settings, we create a new Security Group called ExampleSG in our default VPC, allowing HTTP access to everyone. It should look like this.
We can then add our IAM Role we created earlier. Under Advanced Details, select your IAM instance profile.

Then we need to include some user data which will load a simple web server and web page onto our Launch Template when the EC2 instance launches.
Under ‘advanced details’, and in ‘User data’ paste the following code in the box.
#!/bin/bash

yum update -y

yum install -y httpd.x86_64

systemctl start httpd.service

systemctl enable httpd.service

echo “Hello World from $(hostname -f)” > /var/www/html/index.html
Then simply click ‘Create Launch Template’ and we are done!
We are now able to build an Auto Scaling Group from our launch template.
On the same console page, select ‘Auto Scaling Groups’, and Create Auto Scaling Group.
We will call our Auto Scaling Group ‘ExampleASG’, and select the Launch Template we just created, then select next.
On the next page, keep the default VPC and select any default AZ and Subnet from the list and click next.
Under ‘Configure Advanced Options’ select ‘Attach to a new load balancer’ .
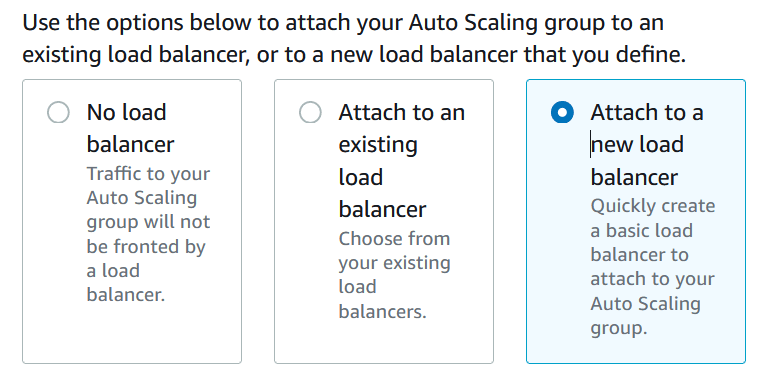
You will notice the settings below will change and we will now build our load balancer directly on the same page.
Select the Application Load Balancer, and leave the default Load Balancer name.
Choose an ‘Internet Facing’ Load balancer, select another AZ and leave all of the other defaults the same. It should look something like the following.
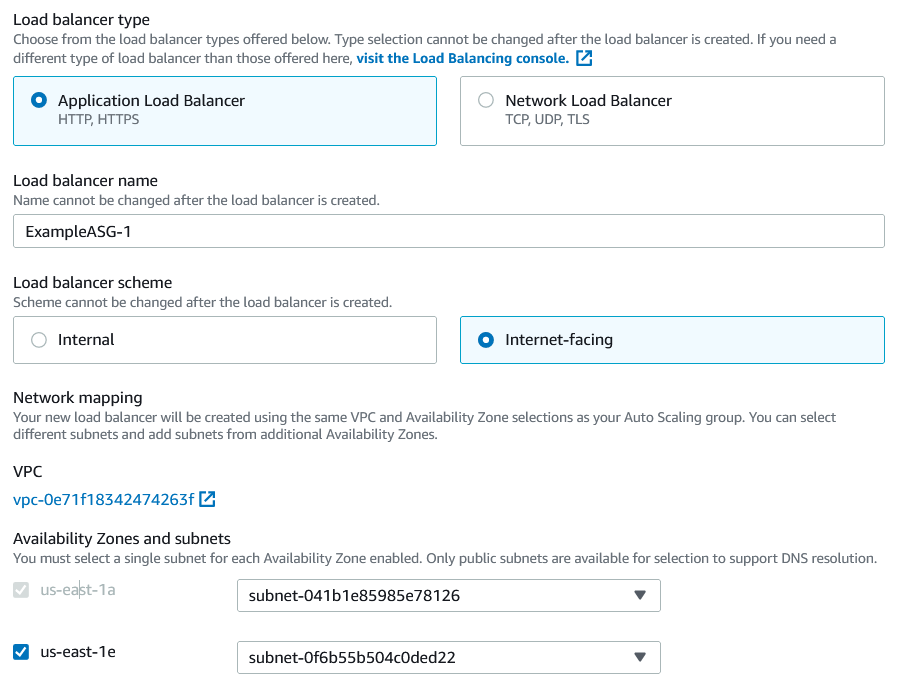
Under ‘Listeners and routing’, select ‘Create a target group’ and select the target group which was just created. It will be called something like ‘ExampleASG-1’. Click next.
Now we get to Group Size. This is where we specify the desired, minimum and maximum capacity of our Auto Scaling Group.
Set the capacities as follows:
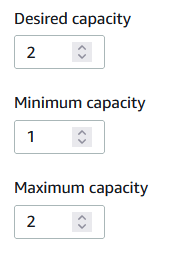
Click ‘skip to review’, and click ‘Create Auto Scaling Group’.
You will now see the Auto Scaling Group building, and the capacity is updating.

After a short while, navigate to the EC2 Dashboard, and you will see that two EC2 instances have been launched!

To make sure our Auto Scaling group is working as it should – select any instance, and terminate the instance. After one instance has been terminated you should see another instance pending and go into a running state – bringing capacity back to 2 instances (as per our desired capacity).
If we also head over to the Load Balancer console, you will find our Application Load Balancer has been created.

If you select the load balancer, and scroll down, you will find the DNS name of your ALB – it will look something like ‘ ExampleASG-1-1435567571.us-east-1.elb.amazonaws.com’.
If you enter the DNS name into our URL, you should get the following page show up:
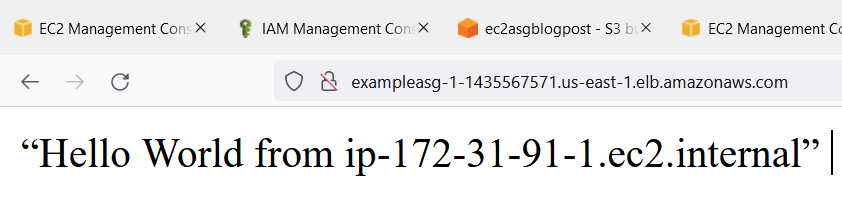
The message will display a ‘Hello World’ message including the IP address of the EC2 instance which is serving up the webpage behind the load balancer.
If you refresh the page a few times, you should see that the IP address listed will change. This is because the load balancer is routing you to the other EC2 instance, validating that our simple webpage is being served from behind our ALB.
The final step Is to make sure you delete all of the resources you configured! Start by deleting the Auto Scaling Group – and ensure you delete your load balancer also – this will ensure you don’t incur any charges.
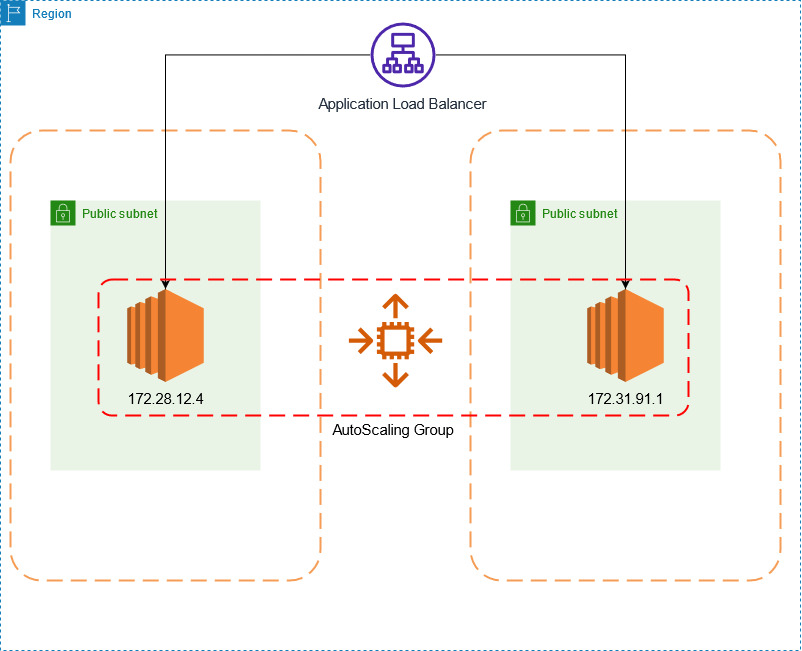
Architectural Diagram
Below, you’ll find the architectural diagram of what we have built.
Learn how to Master the AWS Cloud
AWS Training – Our popular AWS training will maximize your chances of passing your AWS certification the first time.
Membership – For unlimited access to our cloud training catalog, enroll in our monthly or annual membership program.
Challenge Labs – Build hands-on cloud skills in a secure sandbox environment. Learn, build, test and fail forward without risking unexpected cloud bills.