
AWS Glue is a serverless tool developed for the purpose of extracting, transforming, and loading data. This process is referred to as ETL. AWS Glue enables businesses to extract data from one source, transform the data, and then load it into a data warehouse, all from the cloud. AWS Glue is also a fully managed service, which means we as users don’t have to manage any cloud infrastructure, it’s all taken care of by Amazon.
Why is AWS Glue so powerful?
Glue is powerful because it combines the speed and performance of Apache Spark with the data organization of Hive. You may have heard of Lambda, another fully managed service by AWS. Unlike Lambda, which has a 15 minute timeout, Glue has a default timeout of two days. If you have been using Lambda for some projects that were taking too long you can perhaps choose Glue, depending on the situation.
AWS Glue will allow you to have faster data integration by reducing the time it takes to analyze your data. It will also automate your data integration tasks by crawling data sources, identifying data formats, and suggesting relevant schemas to store your data. AWS Glue runs serverlessly, meaning that there is no infrastructure management, provisioning, configuring, or scaling of resources that you have to do. You only pay for the resources that are used while running a job.
We’ll be taking a beginner-friendly approach to this hands-on lab. We’ll be making our first crawler in AWS Glue, running it, and looking at the table it creates. A crawler essentially allows us to gather data from multiple data stores and then create one data table. Combined with AWS Glue this can allow us to transform our data too. Let’s dive into our hands-on to see how it works.
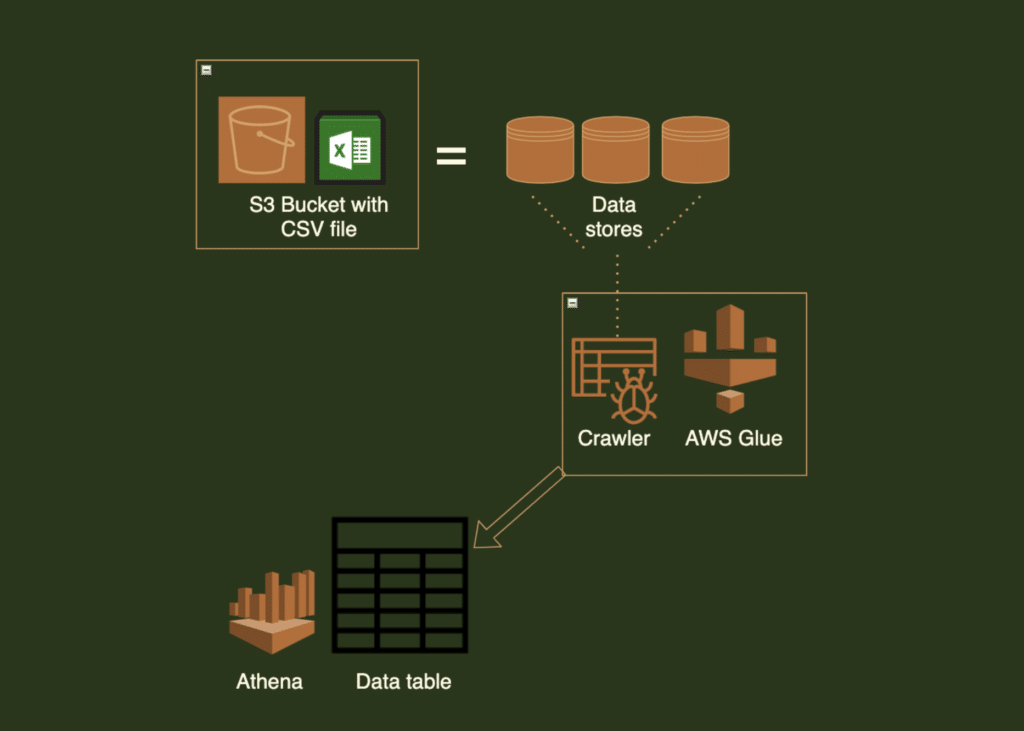
An S3 bucket has an Excel Sheet file with business data to be analyzed. This is our source data store. We create a crawler to gather information so that AWS Glue can transform it into a different format. AWS Athena can then be used to perform analytics on the combined and newly formatted data.
Preparation
There are a few steps you’ll need to take to prepare your AWS account and the tools and files you need before starting the AWS Glue tutorial:
- AWS Account Setup – You’ll need an AWS Account for this tutorial. To create an account, click HERE. Simply follow the instructions in Neal’s video tutorial on How to create an AWS Free Tier Account.
- IAM Role for AWS Glue – Navigate to the IAM console. Click on Roles and Create Role. Here you’ll select Glue service from the section Choose the service that will use this role. Choose Glue for Select your use case. You’ll then select AWSGlueServiceRole and S3FullAccess from Attach Permissions Policies. Leave the tag section blank and then create the role.
- S3 Bucket Setup – We’ll need to have data stored in an S3 bucket in order to complete this tutorial. Now, within the AWS management console, navigate to S3 and click on Create bucket. Give it a name, a region, and then finish creating your bucket. Create a folder, and call it Source.
Now that we’re all set up let’s get started! Click here for the mock data we’ll be using.
Create a Crawler
Navigate to AWS Glue on the Management Console by clicking Services and then AWS Glue under “Analytics”.
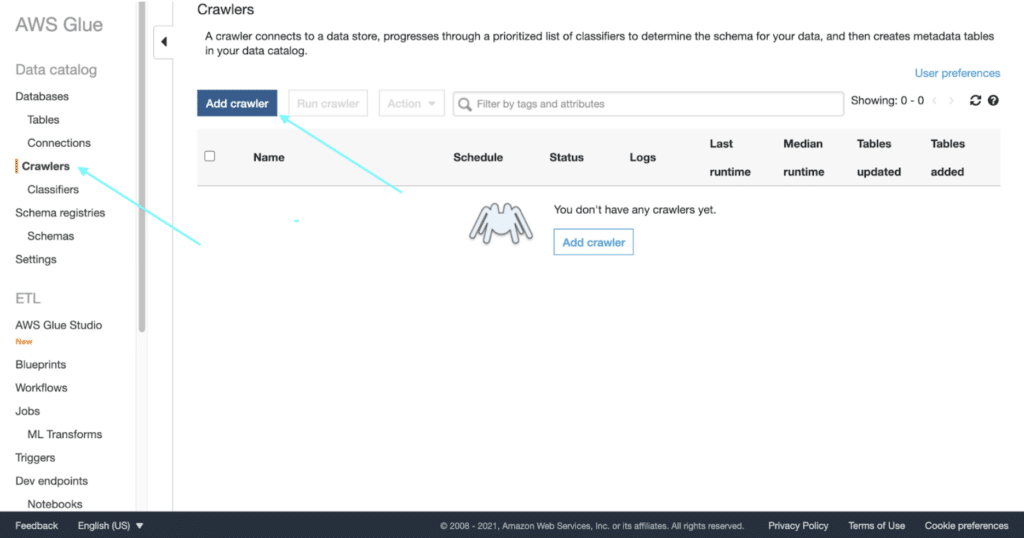
Navigate to “Crawlers” and click on Add crawler.
Here we’ll put in a name.
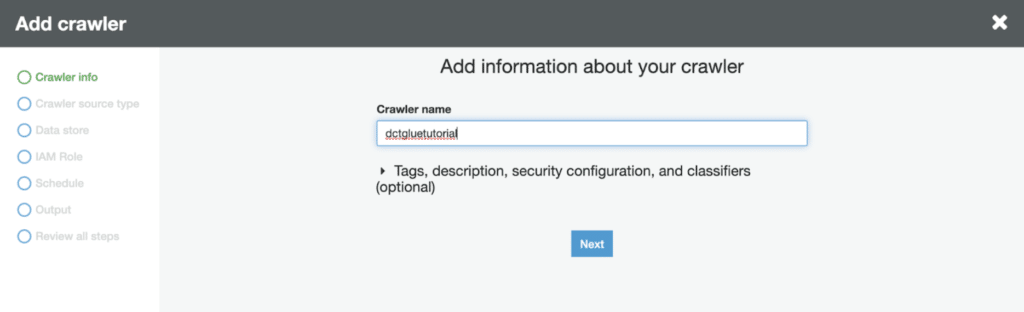
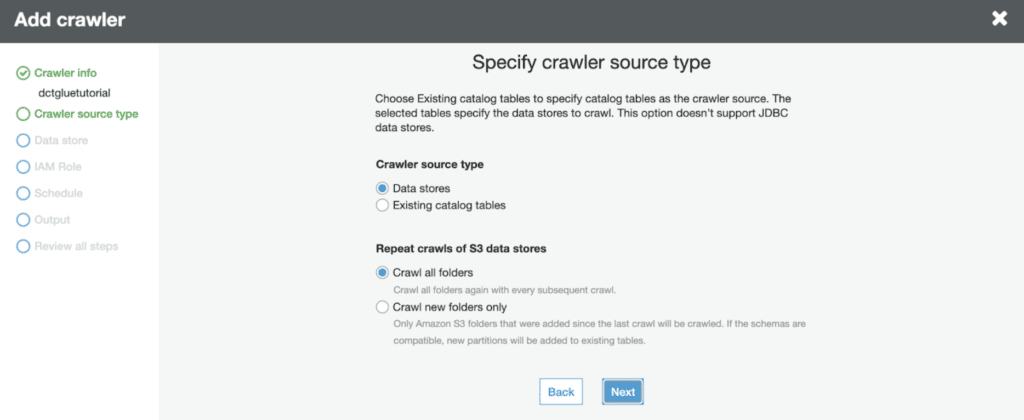
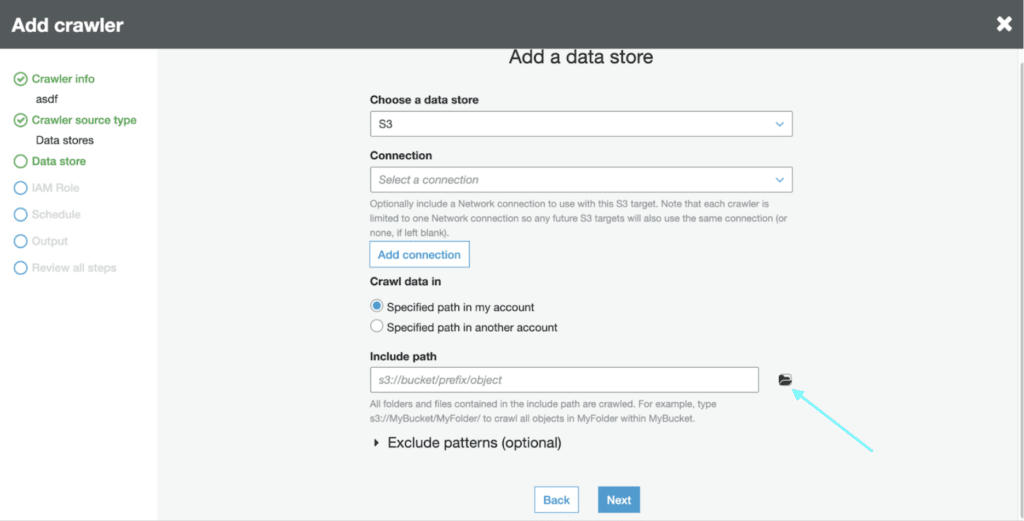
You can leave the default options here and click Next.
On the next page click on the folder icon.
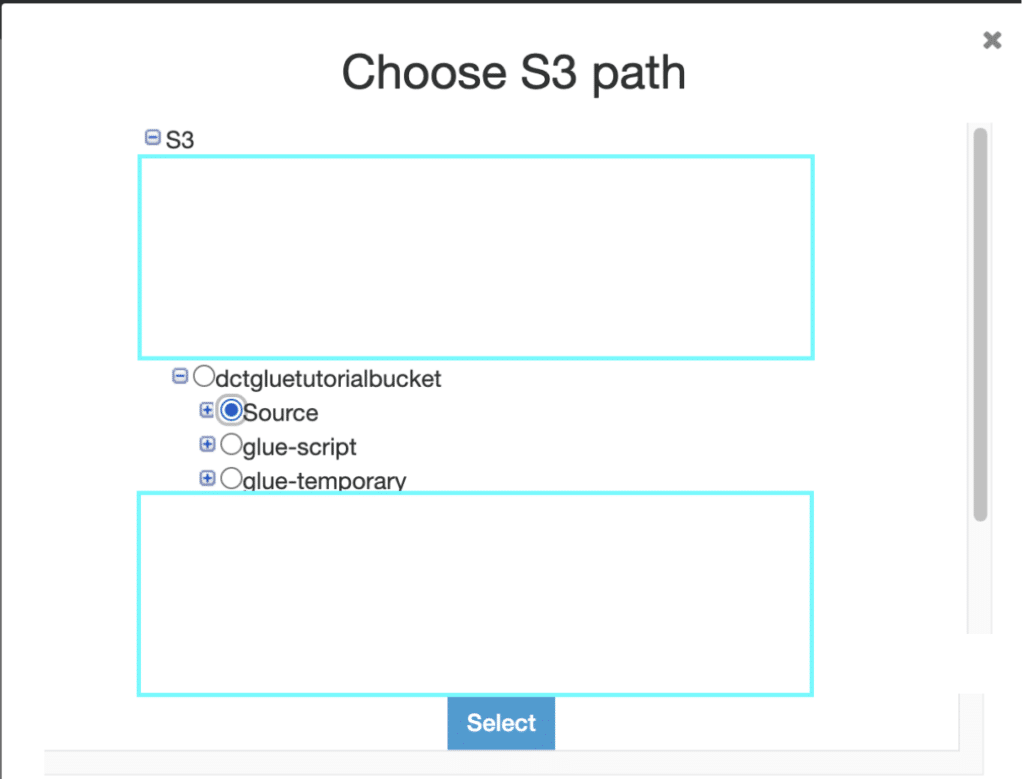
Here you’ll select the S3 folder we created in the “Requirements” section of this lab.
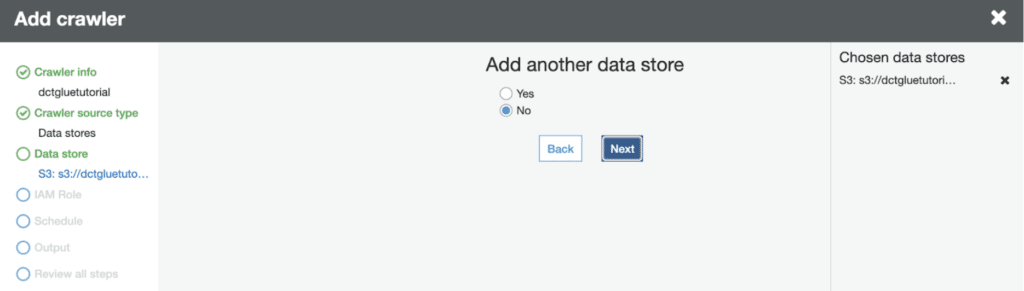
We won’t need more than one data store so just click “No” and Next.
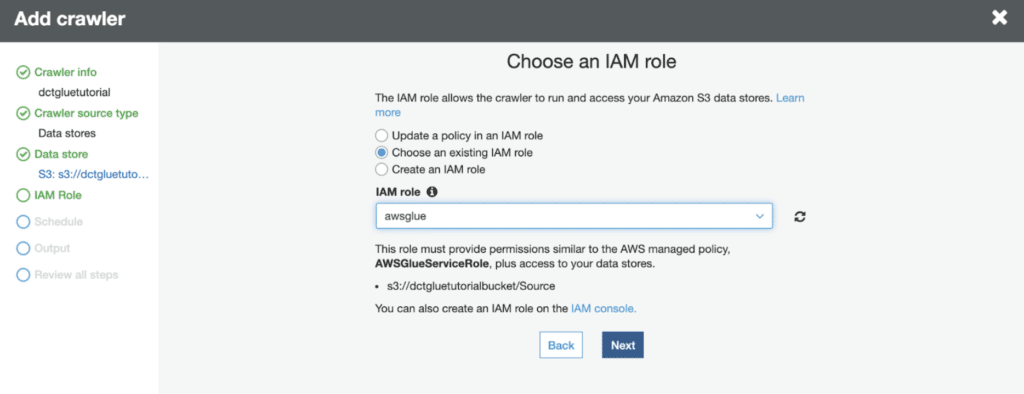
Here you’ll be choosing the existing IAM role we made in the “Preparation” section of this lab.
Leave the frequency on as “Run on Demand”.

Add a database by clicking on the button below and giving it a name.
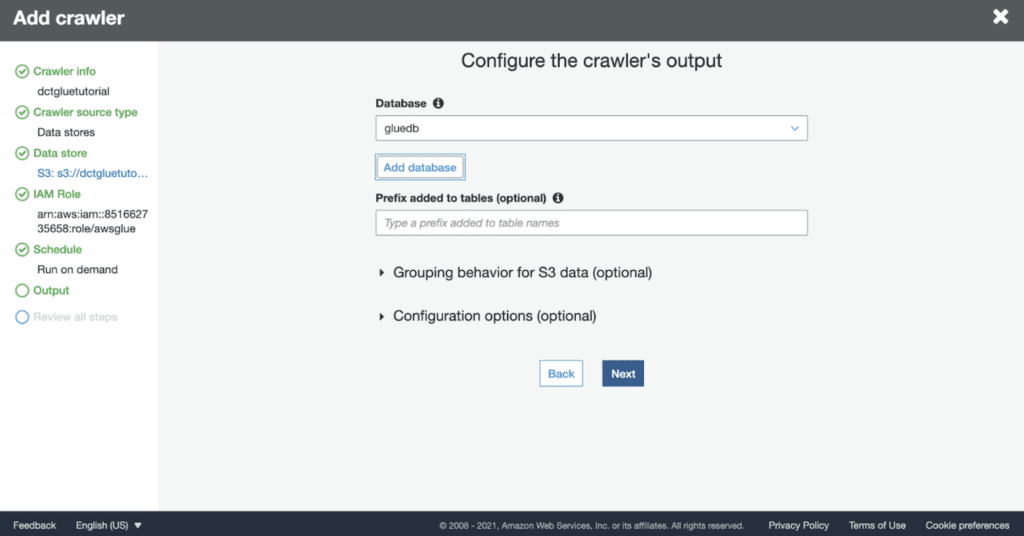
Then, on the next page, click on Finish.
Congrats, you just created your first crawler! Now let’s run it.
Run a Crawler
Select the crawler you created, then click Run crawler.

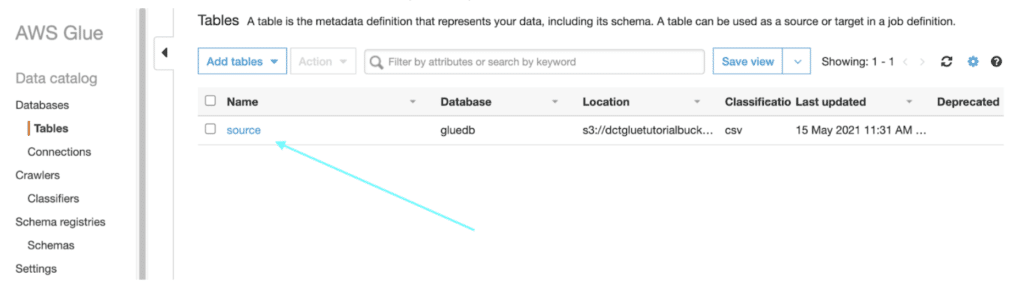
Upon running the crawler you should see it running successfully after a minute or two. Then navigate to “Tables”.
Click on the table that was created for you by the crawler.
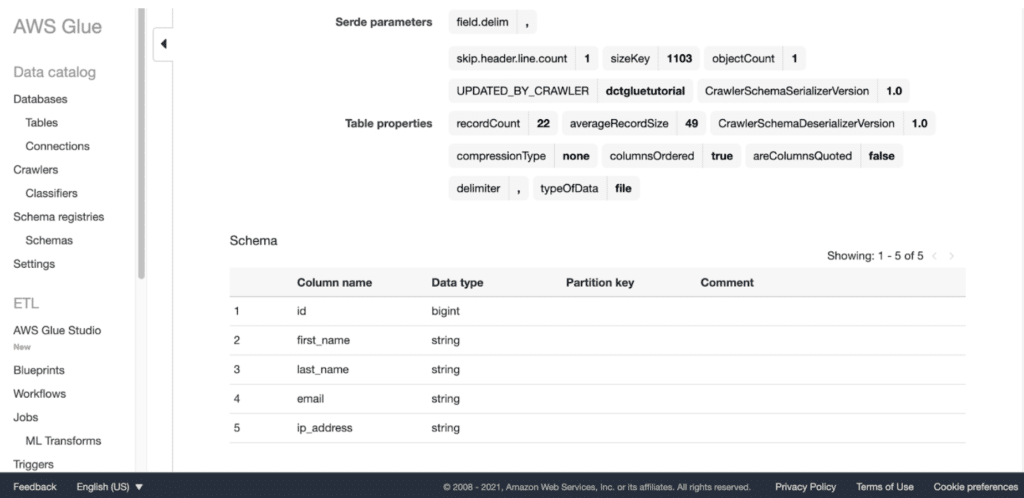
Upon entering into your table and scrolling down you should see similar information. This not only shows that it successfully uploaded to a database table but provides helpful information about the data.
Congratulations, you’ve just completed your first AWS Glue Tutorial! You created and ran your first database crawler. This is the first step in using AWS Glue and you’re well on your way to becoming a master! However, there’s still so much we haven’t done with AWS Glue yet. We could go in and query the table we created with Amazon Athena or perform some other ETL functions. AWS Glue can also be used to create jobs. Seriously, there’s so much to do with AWS Glue! Learn more by following us on LinkedIn and FaceBook.
Ready to Take Your Tech Career to the Next Level?
- On-Demand Training: Learn at your own pace and on your own schedule.
- Challenge Labs: Apply what you’ve learned in a real-world setting without the risk of incurring surprise cloud bills.
- Cloud Mastery Bootcamp: Build job-ready skills with this live, immersive training that can get you certified faster than you thought possible.
AWS Glue features in several of our AWS certification training courses including the following: