
Serverless architecture is a modern approach to building and deploying applications that eliminates the need for servers. Instead, third-party services maintain, scale, and patch the servers, allowing developers to focus on writing code and building features without worrying about infrastructure. The benefits of serverless architecture are numerous, including cost efficiency, scalability, and security.
With serverless architecture, developers can focus on developing application features rather than managing infrastructure, which can significantly speed up development cycles. AWS Lambda is a popular serverless offering from Amazon Web Services that allows you to run code in response to events without the need to create or manage servers.
One of the biggest advantages of AWS Lambda is that you only pay for the computing time used to execute your functions, which means you don’t have to worry about paying for idle server time. Additionally, AWS Lambda automatically scales based on requests, ensuring that your application can handle any level of traffic without any intervention from you.
You can deploy code in Lambda using any programming language like Java, .Net. Python, PHP. etc. Python’s official AWS SDK is Boto3. Boto3 lets you develop, edit, and activate Lambda functions based on events or triggers. Python developers can use AWS Lambda and Boto3 to implement serverless applications employing serverless architecture’s scalability and cost-efficiency.
This tutorial covers AWS Lambda, Boto3, Python, and API Gateway serverless app development. It will teach you:
- Serverless architecture basics and benefits.
- Python with Boto3 for AWS Lambda creation, management, and invocation.
- Integrating AWS Lambda functions with API Gateway to construct scalable and cost-effective APIs.
- AWS Lambda, Boto3, Python, and API Gateway serverless application best practices.
After going through this tutorial, you will be able to develop serverless applications using AWS Lambda, Boto3, Python, and API Gateway. Let’s get started by setting up AWS Lambda and exploring the world of serverless application development.
Setting up AWS Lambda
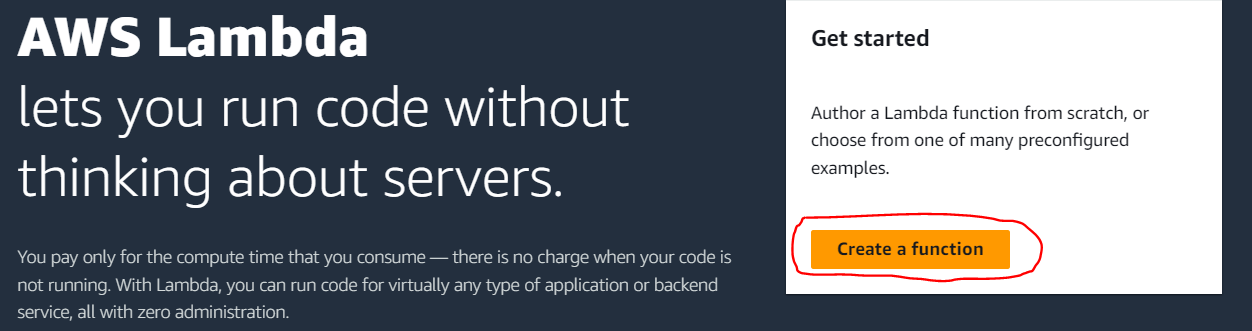
- Create a new Lambda function in the AWS Lambda console.
2. Select “Author from scratch”, give your function a name, and select “Python 3.x” as the runtime.
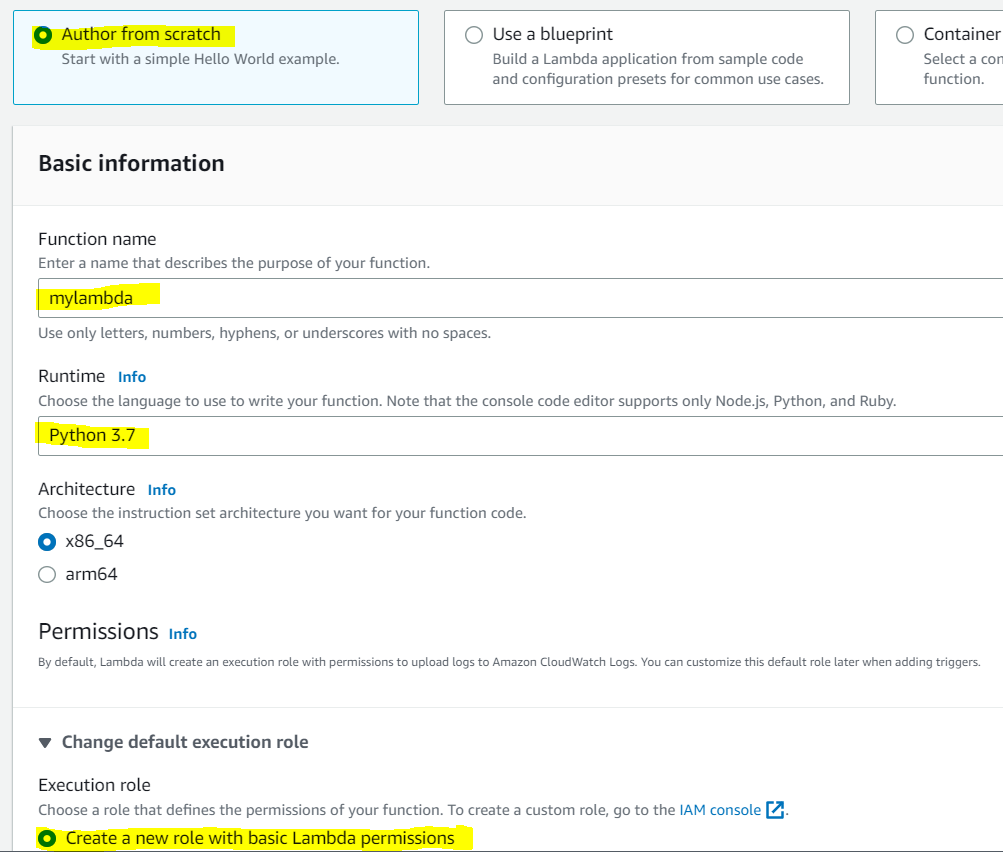
3. Choose an existing or create a new execution role with permissions to access S3 and attach it to the function.
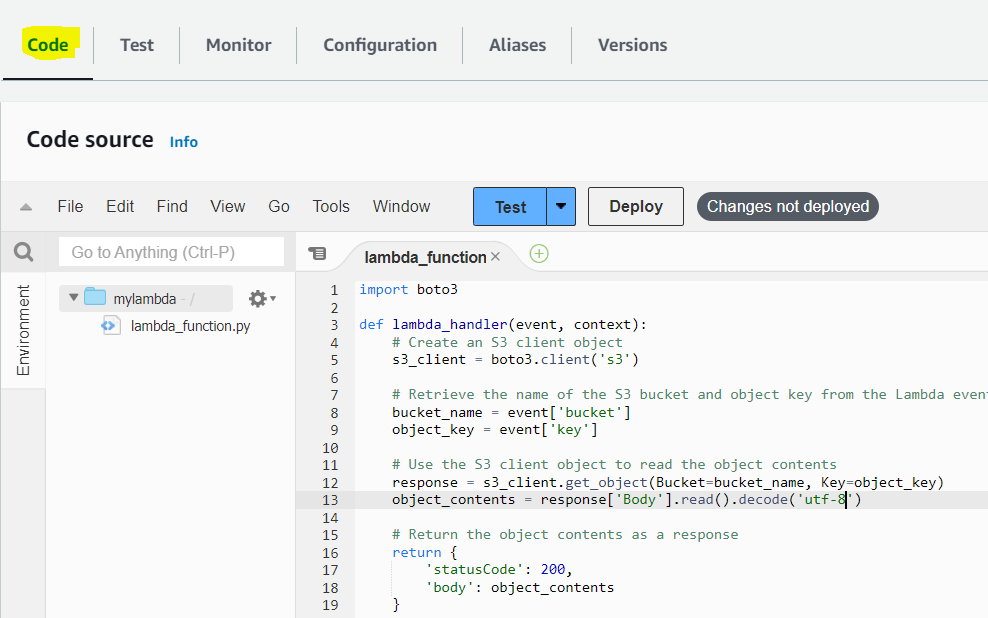
You will see that your newly created Lambda function.

4. In the function code section, paste the code for the Lambda function that interacts with S3 using Boto3. Here is the sample code:
import boto3
def lambda_handler(event, context):
# Create an S3 client object
s3_client = boto3.client(‘s3’)
# Retrieve the name of the S3 bucket and object key from the Lambda event
bucket_name = event[‘bucket’]
object_key = event[‘key’]
# Use the S3 client object to read the object contents
response = s3_client.get_object(Bucket=bucket_name, Key=object_key)
object_contents = response[‘Body’].read().decode(‘utf-8’)
# Return the object contents as a response
return {
‘statusCode’: 200,
‘body’: object_contents
}
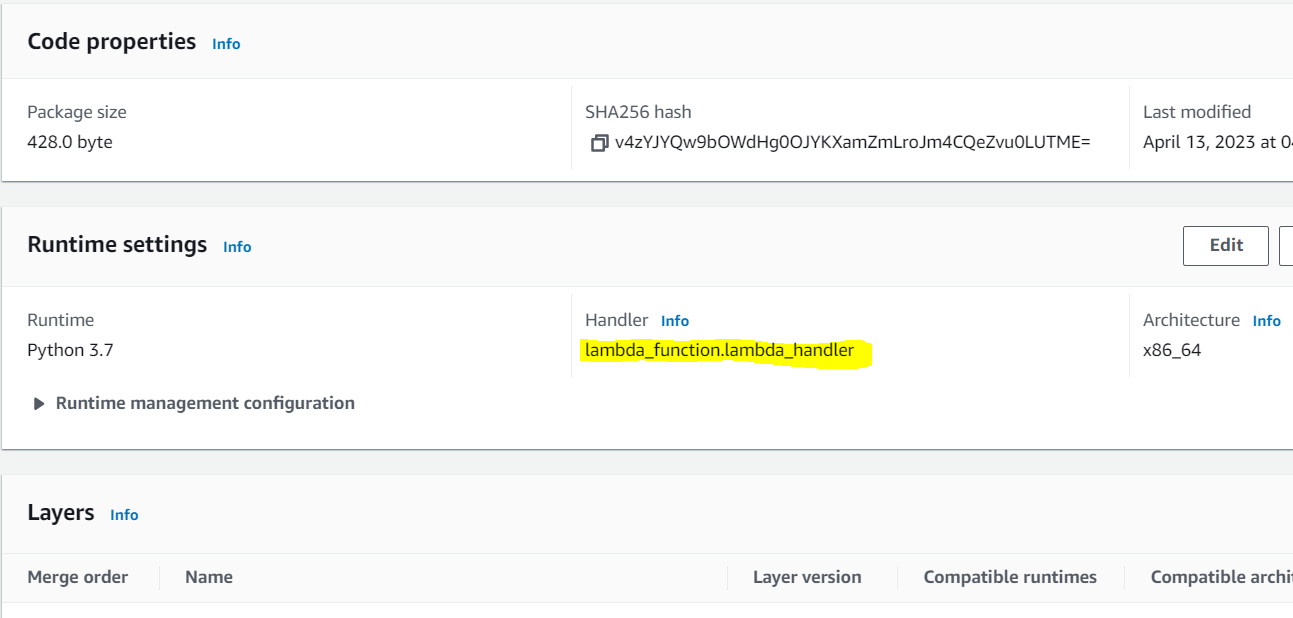
5. Set the handler to lambda_function.lambda_handler as shown below:
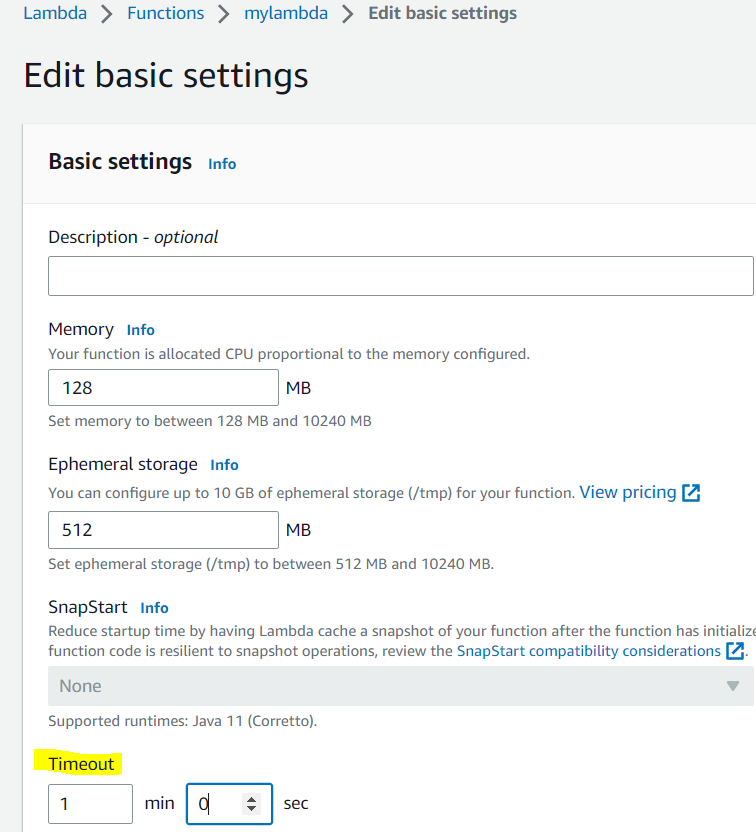
6. In the Basic settings section, set the timeout to an appropriate value for your function, such as 1 minute.
7. Click the “Save” button to create the Lambda function.
Congratulations on creating your first Lambda function! Now that you’ve got your feet wet with serverless development, let’s dive into the details of this Python function and see what it does.
Writing Lambda Functions with Boto3
Let’s examine how this Lambda function works in detail.
import boto3
import os
import json
import base64
def lambda_handler(event, context):
s3_client = boto3.client(‘s3’)
bucket_name = os.environ.get(‘BUCKET_NAME’)
object_key = os.environ.get(‘OBJECT_KEY’)
try:
response = s3_client.get_object(Bucket=bucket_name, Key=object_key)
# object_data = response[‘Body’].read().decode(‘utf-8’)
object_data = base64.b64encode(response[‘Body’].read()).decode(“utf-8”)
print(f”Object data: “)
return {
‘statusCode’: 200,
‘body’: json.dumps({
‘data’: object_data
})
}
except Exception as e:
print(f”Error accessing object from bucket : “)
return {
‘statusCode’: 500,
‘body’: json.dumps({
‘error’: f”Error accessing object from bucket “
})
}
The first step is to import the Boto3 library using the “import” statement. Then, we create an S3 client object using the “boto3.client()” method, passing string “s3” as the parameter.
The next step is to retrieve the S3 bucket name and object key from the Lambda event object, which is passed as a parameter to the “lambda_handler()” function. We then use these parameters to call the “s3_client.get_object()” method to fetch the object’s data.
Then we return the object’s contents as a response from the Lambda function using a dictionary with a “statusCode” of 200 and the “body” containing the object’s contents.
Please note that in order to use Boto3 with S3 or any other AWS service, you must connect an IAM role that contains the necessary permissions to your Lambda function. In this example, we will be using a S3 bucket and we will also set the relevant S3 permissions in the upcoming section.
Setting S3 Permissions
Let’s configure the IAM role attached to your Lambda function with the required S3 permissions. We will add a policy to the IAM role that allows access to the S3 service.
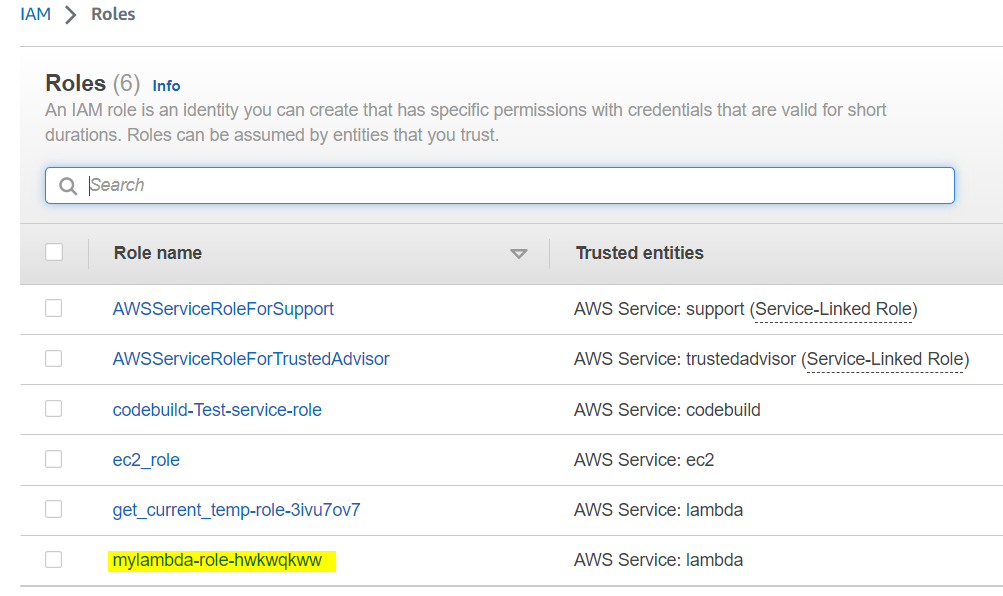
- Go to the IAM roles in AWS console.

2. You will see a role already created by your Lambda function whose name was “Mylambda”. See the below screenshot your for reference.
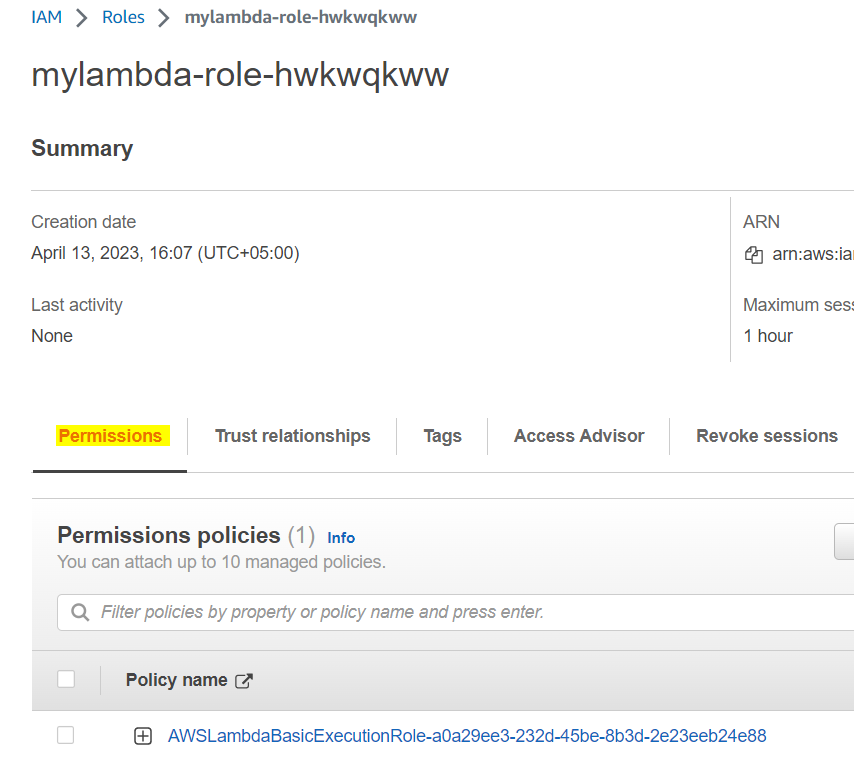
3. Click on this role to view the details of this role. You will see a policy already created and attached with this role. Now you need to attach another policy for S3 bucket.
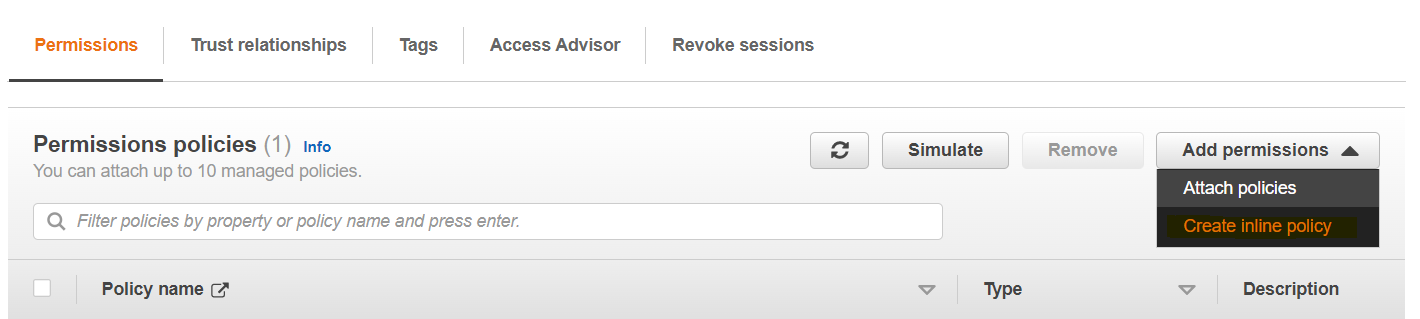
4. Go to add permissions and click on “create inline policy” as shown below:
5. Go to the JSON tab on the policy screen and add the following JSON to the editor:
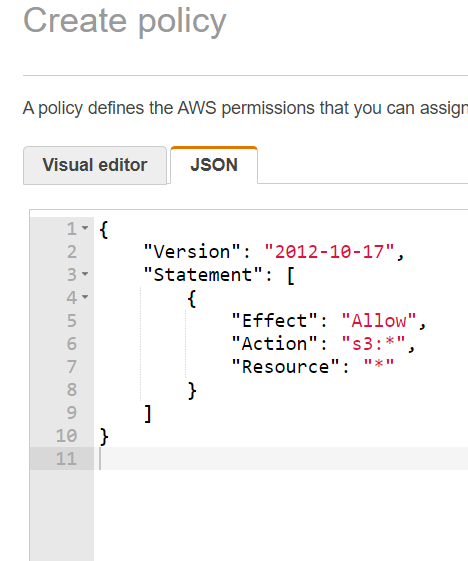
Here is the policy:
{
“Version”: “2012-10-17”,
“Statement”: [
{
“Effect”: “Allow”,
“Action”: “s3:*”,
“Resource”: “*”
}
]
}
As you can see from the policy, it is allowing this Lambda function to access S3 buckets and objects.
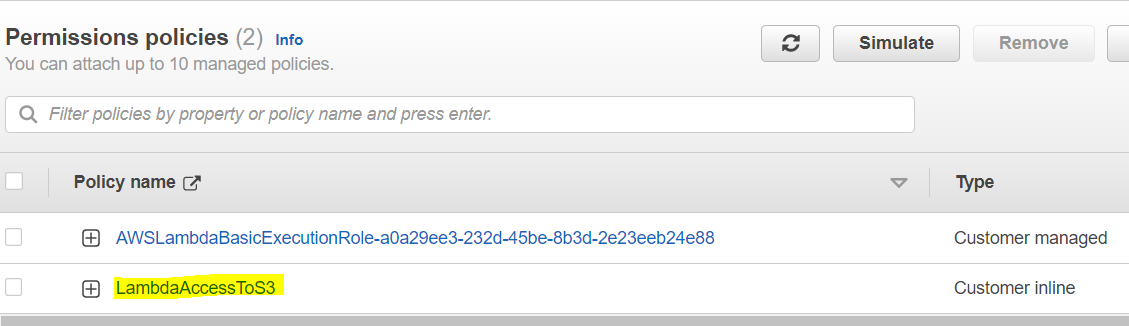
6. Now review the policy and provide a meaningful name to the policy as shown in the below image. Then click on the “create policy” button to create the policy:

7. After successfully creating the policy, you can see your new policy listed in the permissions tab of the role.
Now that we have configured both the Lambda function and its access to S3, it is time to deploy this Lambda function and test it.
Deploying and Testing Lambda Functions
Here are the steps to deploy and test this Lambda function.
- Go to the Lambda function and click on the “Deploy” button to deploy the latest changes. In the below screenshot, the latest changes are not yet deployed.

2. After deploying the changes, now it is time to test this function. When you click on the blue “Test” button, a “configure test event” pop-up will appear:
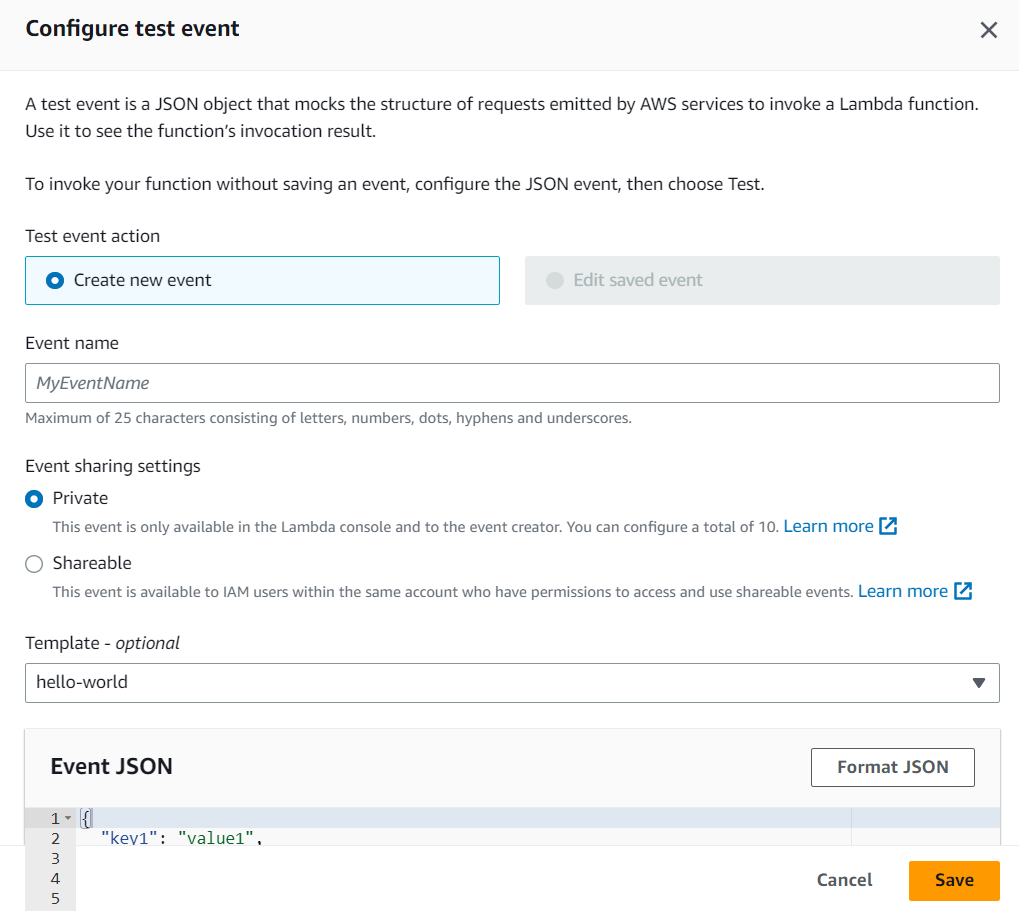
3. Through this screen, you can pass any data to the Lambda function. In our case, we will need to pass the bucket name and the name of the bucket object. Here is the JSON you will need to add in the section of “Event JSON”:
{
“bucket”: “tests3bucket-kb”, // name of the S3 bucket
“key”: “1664351578845.jpg” // name of the object in the bucket
}
You will also need to provide an event name before saving. Provide any meaningful name to the event.
4. After you click on “Test”, you will see the results in the tab of “Execution Results”. For a successful run of the function, you will see something similar to what is shown below:
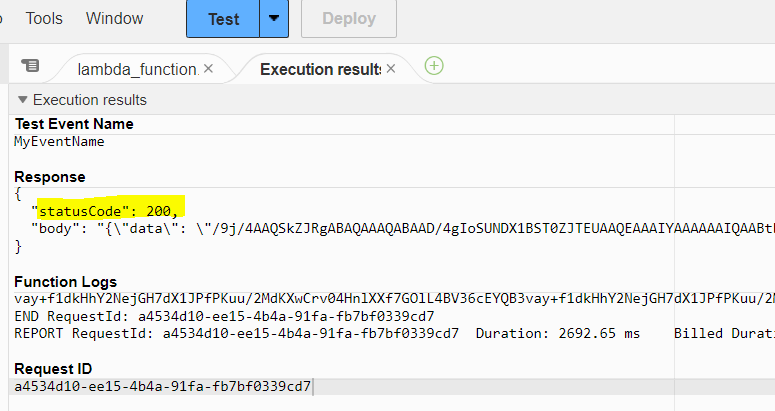
You can see the response code is 200 indicating that it was successful.
In the next section, we will explore how to trigger a Lambda function through serverless API gateway. API gateway is a fully managed API service by AWS where you can create and deploy your own API’s easily.
How to configure AWS API gateway to trigger this Lambda function
Here are the steps to configure API gateway to trigger the Lambda function you just created in the previous steps:
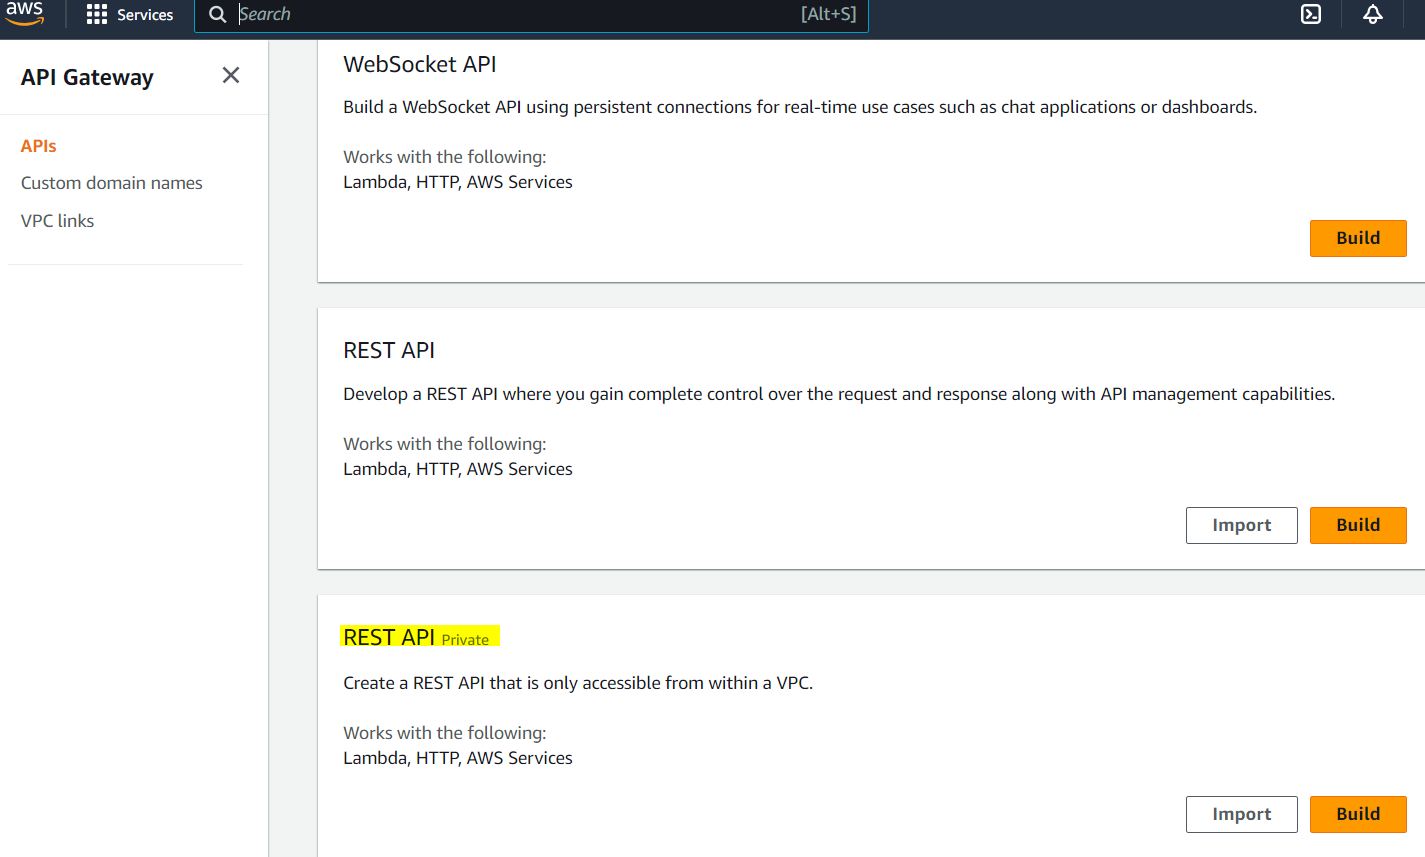
- In the AWS console, go to API Gateway. On the API gateway screen, select the option to create new REST API (Private):
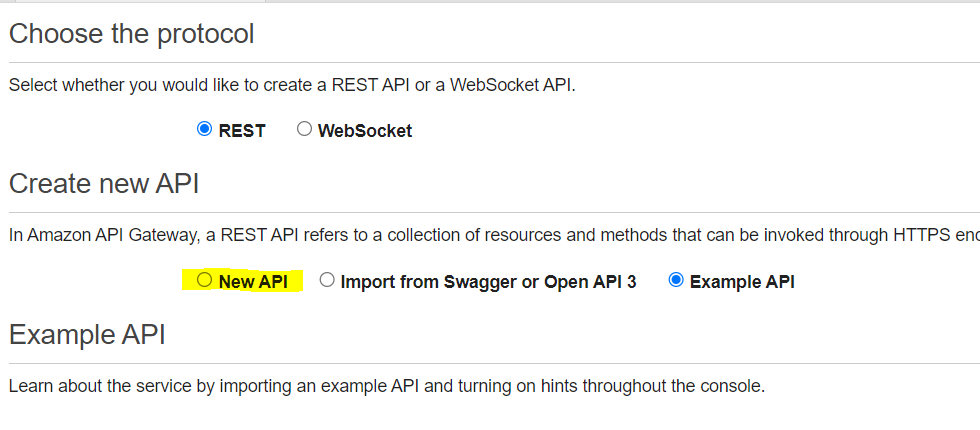
2. Next, choose the option to create a new API:
3. Insert the name, description and the type of endpoint. Keep in mind that since the REST API will be available on the public internet, it will be a regional endpoint, not a private one.

4. In the next step, create a method (like GET, POST, etc.)

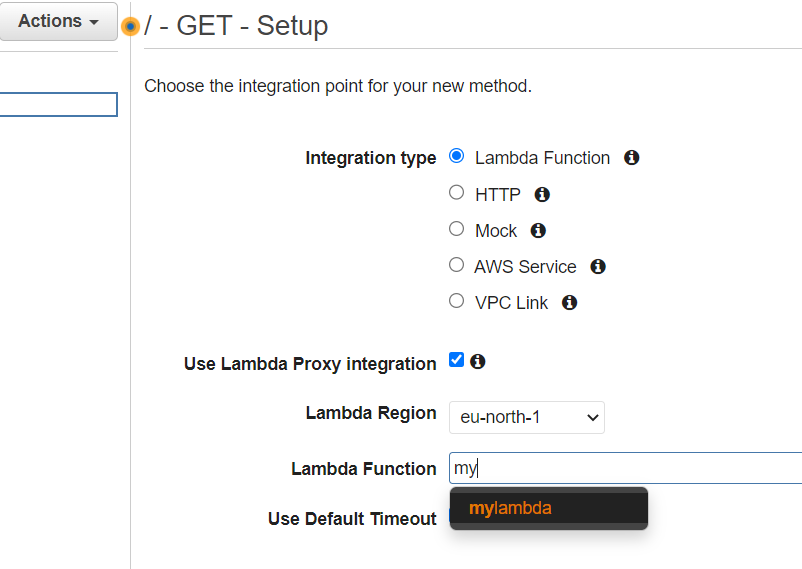
5. After creating the method, you will see the setup screen of this method as shown below. Choose “Lambda” as integration type and enable “Lambda proxy integration”. Note that as soon as you will start typing the name of the Lambda function, it will auto suggest the function.
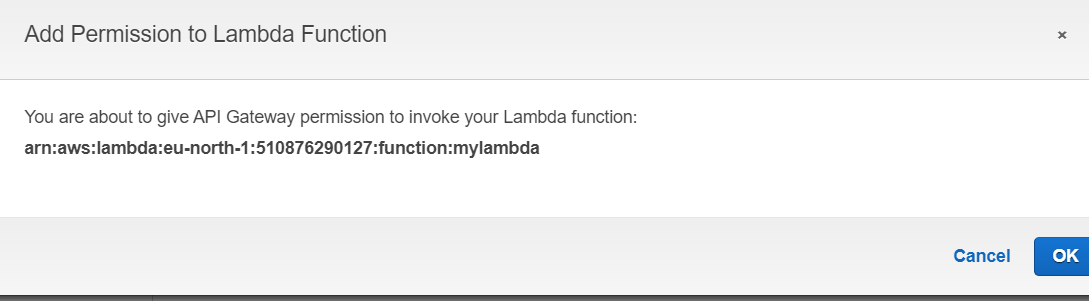
6. Once you click save, you’ll be presented with a screen for granting permissions to the Lambda function:
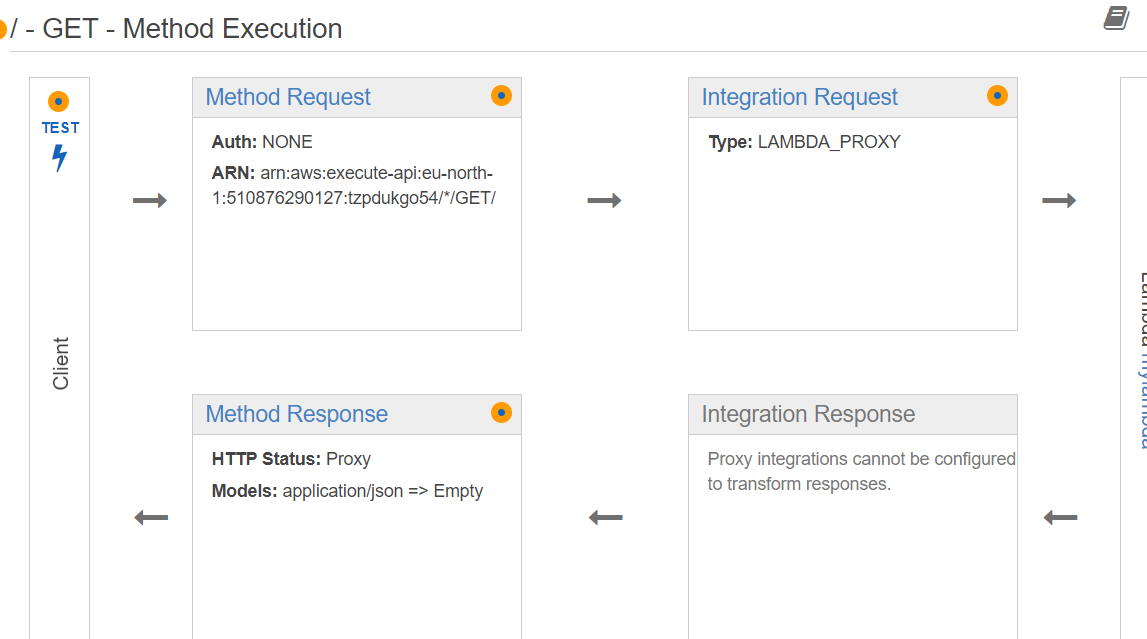
7. After clicking “OK” you will see the complete workflow of your GET method:
8. Now let’s test this method by clicking the “Test” button. You will see the response on the right side, as shown below:
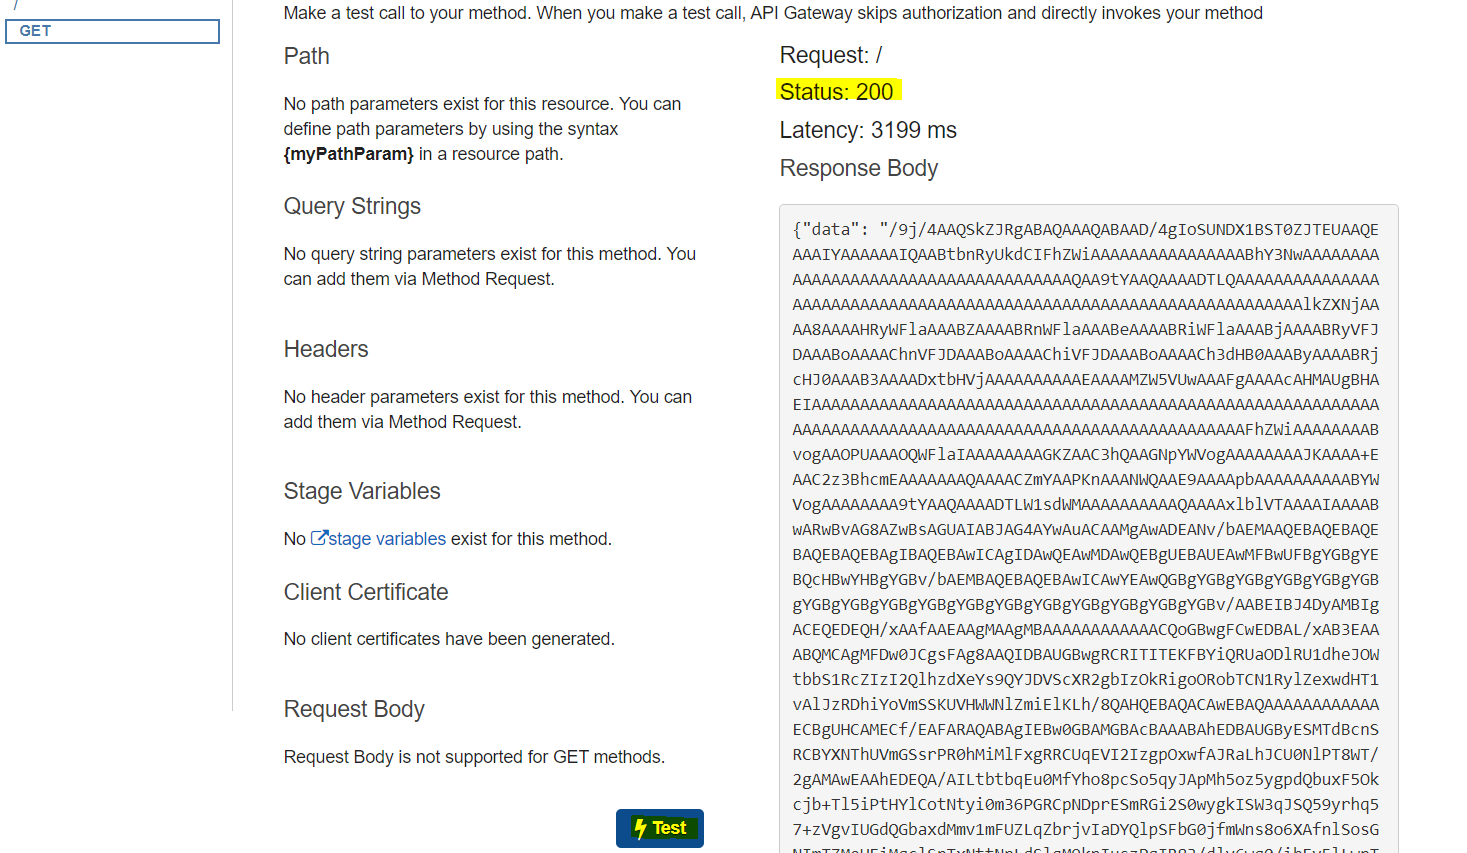
The status of the call is 200, indicating a successful request. In the “data” section, you can see the content of the image file in base64 format, as it is an image file. If it were a text file, you would see the actual text content of the file instead.
Conclusion
In this tutorial, we explored the world of serverless architecture and discovered how it can simplify the life of a developer. We learned that going serverless with AWS Lambda, Boto3, Python, and API Gateway can save money, improve scalability, and accelerate project delivery.
AWS Lambda provides a straightforward way to develop serverless applications, while Boto3 enables us to communicate with AWS services using Python. With Lambda and API Gateway, we can build effective APIs for our serverless functions.
To continue improving our serverless journey, we must stay up-to-date with emerging serverless technologies, practices, and tools. Now that you’ve completed this tutorial, you’re ready to tackle modern application development using AWS Lambda, Boto3, Python, and API Gateway with confidence.
Ready to Take Your Tech Career to the Next Level?
At Digital Cloud Training, we’re dedicated to your success. Our courses offer up-to-date content, equipping you with the expertise to stand out in the competitive tech job market.
Our On-Demand Training allows you to learn at your own pace, fitting seamlessly into your schedule. Dive into the world of cloud computing whenever and wherever suits you best.
But we don’t stop at theory. Our Challenge Labs provide practical, real-world scenarios where you can apply your newfound knowledge without the risk of unexpected cloud costs. Gain hands-on experience and sharpen your skills.
For those seeking an immersive experience, our Cloud Mastery Bootcamp delivers live, job-ready training. Led by industry experts, this accelerated program can get you certified faster than you thought possible.
It’s time to propel your tech career forward. Join us at Digital Cloud Training and unlock your full potential in the world of cloud computing.