
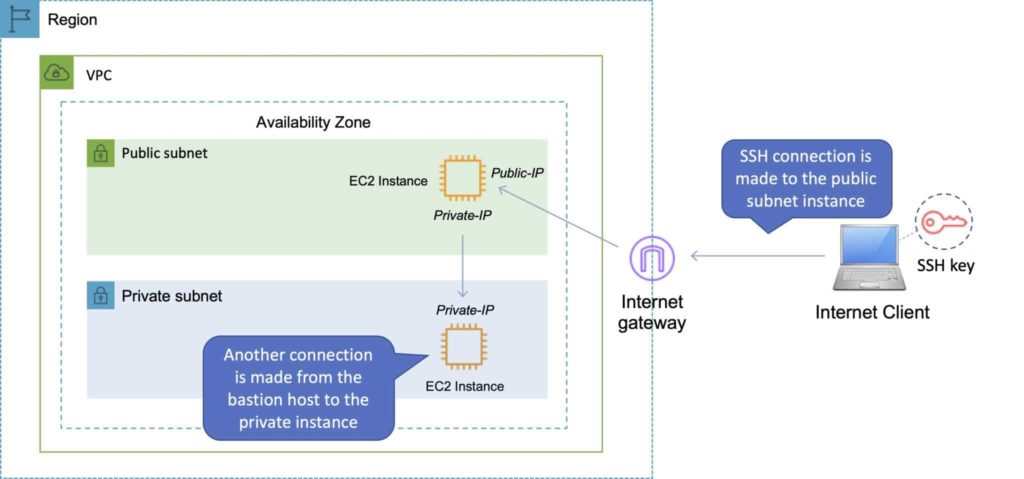
You might be running Amazon EC2 instances in public and private subnets and need a way to SSH into the EC2 instances in the private subnet. You can SSH into EC2 instances in a private subnet using SSH agent forwarding. This method allows you to securely connect to Linux instances in private Amazon VPC subnets via a bastion host (aka jump host) that is located in a public subnet.
The SSH-agent is a key manager for SSH, which holds keys and certificates in memory. The SSH agent keeps private keys safe and saves you from typing a passphrase each time while you connect to a server. The SSH Agent forwarding feature allows a local SSH agent to reach through an existing SSH connection and authenticate on a remote server.
This means you can connect from your computer where your SSH public key file is located and authenticate straight through to the instance in the private subnet via the bastion host in the public subnet. This is depicted in the image below (note that the SSH keys only exist on the client computer):
NOTE: SSH agent forwarding should be enabled with caution as allowing SSH agent forwarding creates a security risk as anyone with root access on the remote host can directly access your local SSH agent through the socket and use the keys by impersonating you on other machines on the network.
What’s SSH and how is it used with Amazon EC2 instances?
Secure Shell (SSH) is a cryptographic network protocol that can be used to securely connect to a computer operating system over an unsecured network. The easiest way to issue commands on an Amazon EC2 Linux instance is to connect to it using a terminal/command line over the SSH protocol. Commands can then be issued as if you were directly working on the computer.
By default, Amazon EC2 instances running Linux use SSH key files for authentication (known as key pairs in AWS). When connecting from an Amazon EC2 instance in a public subnet (the bastion host) to an EC2 instance in a private subnet, the private key file is required. However, for security reasons, the private key files should never be stored on the bastion host. This is why it’s preferred to use agent forwarding to connect from the bastion host to other instances in your Amazon VPC.
Let’s set up our AWS environment
Before we can start connecting, we need to set the AWS environment up. If you don’t already have one, create a new instance that functions as a bastion host in a public subnet. You’ll then need an EC2 instance in a private subnet that you are going to connect to. Both instances should be launched from a Linux Amazon Machine Image (AMI).
Security group configuration:
- The bastion host security group needs to allow inbound SSH from your client computer and outbound to the private EC2 instance security group.
- The private EC2 instance security group must allow inbound SSH from the bastion host security group.
Finally, you’ll need to have access to your private key file, this will be a .pem file on Linux/Mac or a .ppk file if you’re using Putty with Windows (I’ll explain how to generate a ppk shortly).
1. Using a Mac or Linux Client Computer
Configuring the SSH agent on a Mac:
Run the following command:
ssh-add -K myPrivateKey.pem
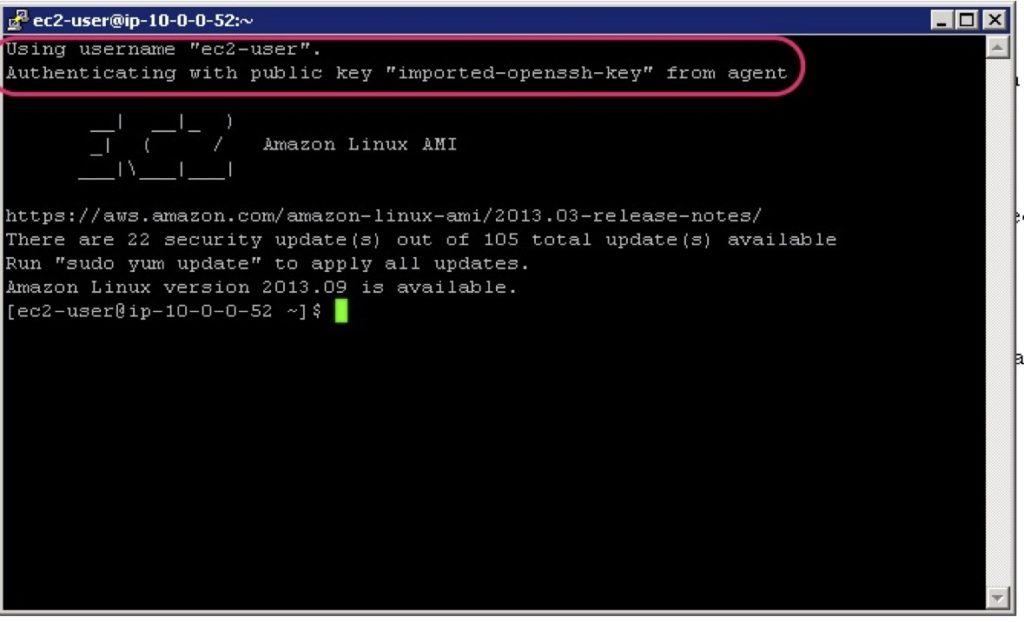
You should see a result like this:

Configuring the SSH agent on Linux:
ssh-add -L myPrivateKey.pem
The output should be similar to above.
Connect to the bastion host from Mac/Linux:
You can now ssh into the EC2 instance bastion host by issuing the following command:
ssh –A ec2-user@<bastion-IP-address or DNS-entry>
NOTE: the ec2-user is used for the Amazon Linux AMI. If you’re using another AMI this could be different.
Connect to the private instances from the bastion host:
Now that you’ve used agent forwarding you can simply connect to any instance that is using the same key pair by simply issuing the following command:
ssh ec2-user@<instance-IP-address or DNS-entry>
2. SSH into EC2 Instance from Windows
In Windows, we can connect to Linux VPC instances using PuTTY. If you’re creating a new key pair you can choose to create a .ppk file in Amazon EC2:

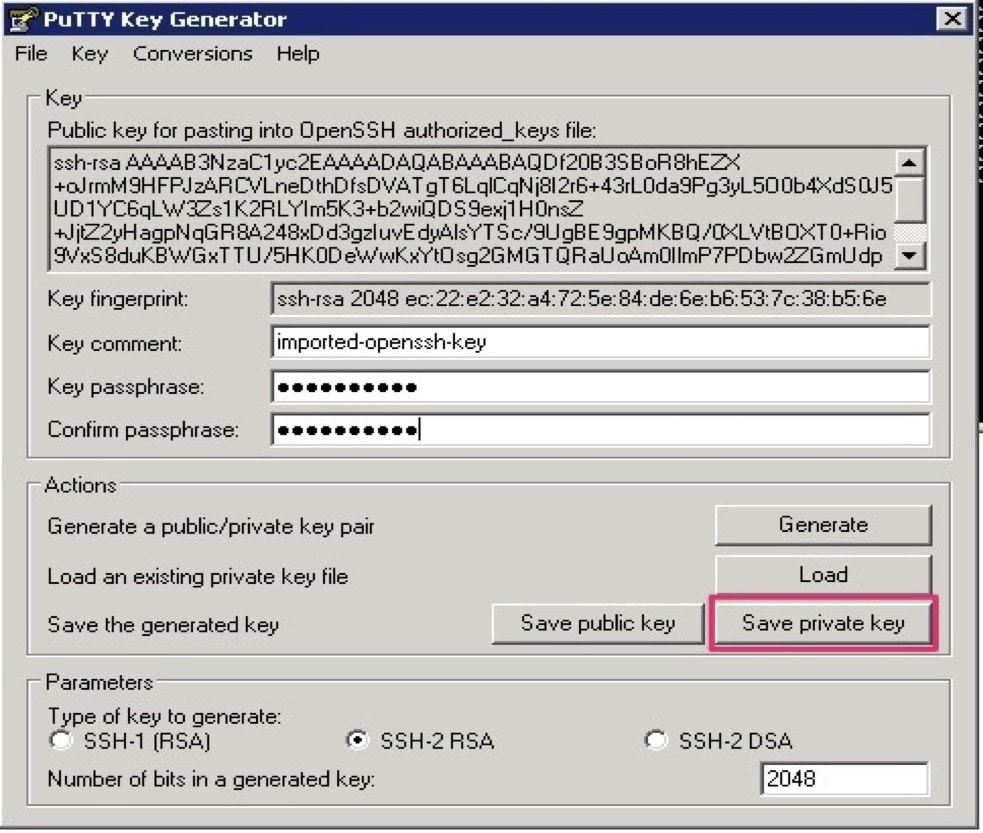
If you’re using an existing .pem key pair you can convert it to a .ppk file using PuTTYgen.
- In PuTTYgen, choose Conversions > Import Key and select your PEM-formatted private key.
- Enter a passphrase and then click Save private key, as shown in the following image:
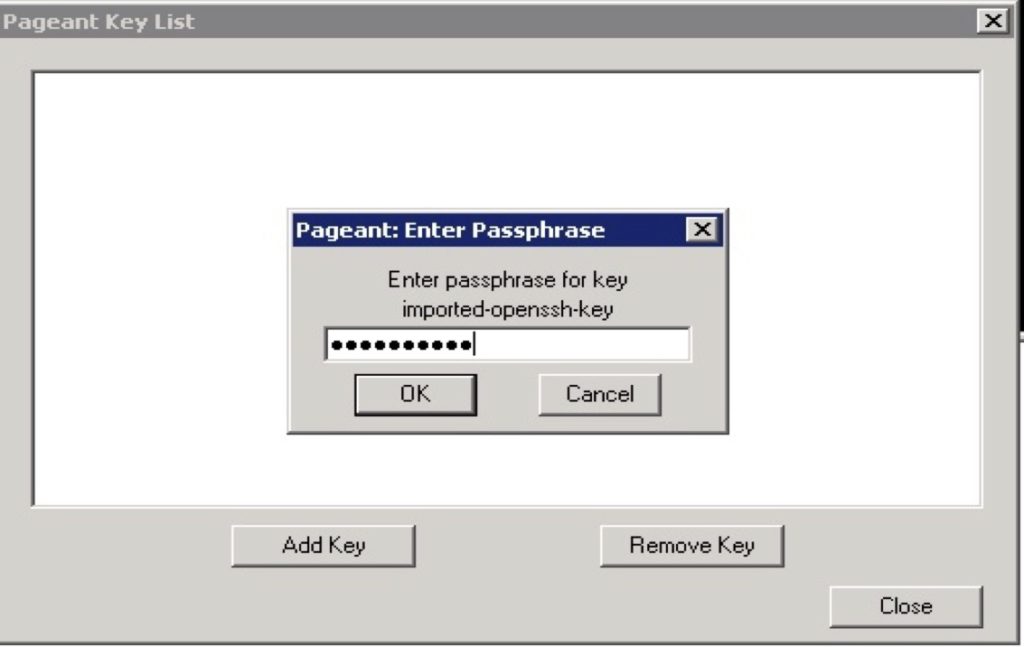
After you convert the private key, open Pageant, which runs as a Windows service. To import the PuTTY-formatted key into Pageant, double-click the Pageant icon in the notification area and then click Add Key. When you select the .ppk file, you’re prompted to enter the passphrase you chose when you converted the key. After you add the key, close the Pageant Key List window.
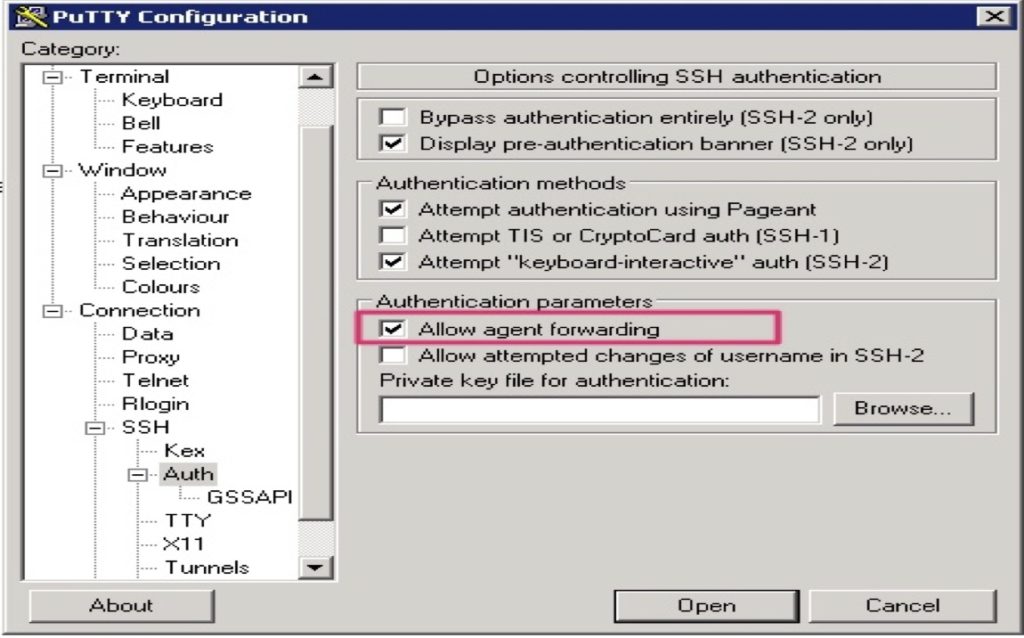
When configuring the connections for SSH in PuTTY, check the Allow agent forwarding box and leave the Private key file for authentication field empty.
With agent forwarding enabled in the PuTTY configuration, you can now connect from the bastion to any other instance in the VPC. You don’t need to have the SSH private key located on the bastion host. To connect to other instances, use the command: ssh ec2-user@<instance-IP-address or DNS-entry>
That’s it! You should now be able to use the SSH protocol to connect securely to your EC2 Linux instances in private subnets via a bastion host without needing to copy your private key pair file into AWS.
Ready to Take Your Tech Career to the Next Level?
- On-Demand Training: Learn at your own pace and on your own schedule.
- Challenge Labs: Apply what you’ve learned in a real-world setting without the risk of incurring surprise cloud bills.
- Cloud Mastery Bootcamp: Build job-ready skills with this live, immersive training that can get you certified faster than you thought possible.