
Today we are going to go through a step-by-step guide on how to take your CV and host it as a CV website. Creating a CV website running on Amazon S3 will definitely help you stand out to employers. If done correctly, this tutorial will make you look like a smart and tech savvy potential employee, who is going above and beyond to put themselves out there.
Not only will this exercise give you a chance to read through your CV and maybe re-write a few parts of it that are no longer relevant – but at the end of this article you will also have your very own CV website hosted on AWS!
Follow the steps in this article to show your cloud skills and demonstrates to potential employers how much effort you are willing to put in to land that first technical role, and how happy you are to do hands-on work in order to get there.
Are you worried that you will need to be an expert in front end web development? Don’t be! As part of this tutorial I have provided a template which you can use to build your own CV Website, which is written in HTML with some CSS, to make it look extra fancy.
If you do have some fancy front end skills, by all means make your own template – as mine is designed to be easily used by people with minimal to no coding experience.
Let’s have a run down on the steps needed to complete this guide:
- Locate the HTML/CSS files in the GitHub Repository
- Edit the files and add your own information, picture, styles etc
- Create the S3 Bucket, enable static website hosting, configure permissions, and upload the files
- Configure a custom domain name and set routing policies using Amazon Route 53
Step 1: Locate the HTML/CSS files in the GitHub Repository
First of all, let’s track down the CV website page files on our GitHub Repository.
The first is to download this file to your local computer. Click on the big green ‘Code’ button that looks like this:

And download the code as a Zip file.
Before we start editing the code, we need a program which can help us edit our code. In the industry we call this an ‘IDE’ – or “Integrated development environment”.
My IDE of choice is Visual Studio Code, for which you can find the download link here: https://code.visualstudio.com/download
Once you have downloaded and opened VS Code, you want to click File, and Open Folder and click on the folder you downloaded from GitHub, and select ‘step-by-step’ It should look like this:
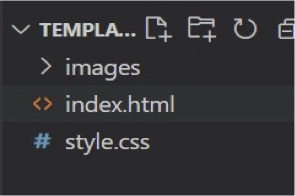
Once you have the files in your IDE, you are ready to get to work.
Step 2: Edit the files and add your own information, picture, styles, etc.
Now it’s time to add your own CV details, as well as customizing your own color scheme, background image etc.
The best website I have found personally for HTML backgrounds is unsplash.com. In order to get started, find a nice and stylish image from there, and replace the ‘noise.jpg’ image in your IDE with your new background that you have found. If you do this, you will have to find where it refers to ‘noise’ in the codebase and change it to your new background’s name.
If you want to make sure it works, you simply change the new background’s name to ‘noise’ to match the existing code in the HTML and CSS file and it will work like a charm.
In the files, there are more detailed comments on each part of both of the HTML and CSS files to explain what they do, so don’t worry if you have never seen HTML or CSS before, you should be able to navigate it just fine and edit the way your website looks to show your personality off to your potential employers.
I also recommend installing ‘Live Server’ as an extension on VS Code so you can constantly check how your website is looking as you are editing it. This will help you tailor your website to look exactly how you want it to. Editing the code might take a while to get used, but just remember to make small changes and save constantly! If you need to start all over again just re-download the files and start again.
Step 3: Create the S3 Bucket, configure permissions and upload the files
This is where we jump into the AWS Management Console. This step can be broken down into 4 smaller and easier to manage steps:
Step 3.1: Create a bucket
First, we are going to make our way to the Amazon S3 management console and create our bucket which in turn is going to host our website. When it comes to naming our bucket, just make sure it is globally unique, as this matters when it comes to S3 Global buckets.
You then have to choose the Region where you want to create the bucket. It is best practice to choose a Region that is geographically close to you to minimize latency and costs. The Region that you choose determines your Amazon S3 website endpoint, which will use to access your CV website before adding a custom domain name in its place. Then accept the default settings and create the bucket.
Step 3.2: Enable static website hosting
This is the magic step which turns our regular S3 bucket into a website! On the bucket we have just created select ‘Properties’ and scroll down to the bottom of the page and select ‘Edit’ under ‘Static Website Hosting’.
Where it says, ‘index document’ simply type in ‘index.html’. What this is telling the bucket is that this page is going to be ‘homepage’ when the website is first opened. As we have called our main HTML page ‘index.html’ this should work fine. Leave all defaults the same and choose ‘Save Changes’.
Under this page, make note of the Endpoint. It should look something like this: http://mytestwebsitejack.s3-website-us-west-1.amazonaws.com/
Keep a copy of this, as we will be using it later!
Step 3.3: Edit Block Public Access settings
To start off with, AWS denies all traffic to your S3 bucket, as a safeguarding measure to ensure you don’t accidentally leak sensitive data over the internet. We need to allow some access however, otherwise how would people see our lovely CV we have just made?
Under your bucket, select ‘Permissions’ and under ‘Block All Public Access Settings’ click ‘Edit’.
Clear the box that blocks all public access and then save the changes.
It is important that you know that when you turn off block public access settings to make your bucket public, anyone on the internet can access your bucket – so make sure the information inside is not sensitive.
Step 3.4: Add a bucket policy that makes your bucket content publicly available.
We then add a Bucket Policy to our Bucket to allow public read access. A Bucket Policy is a JSON document which allows fine grained access control to your S3 buckets and the items inside them. The Bucket Policy is as follows:
{
    "Version": "2012-10-17",
    "Statement": [
        {
            "Sid": "PublicReadGetObject",
            "Effect": "Allow",
            "Principal": "*",
            "Action": [
                "s3:GetObject"
            ],
            "Resource": [
                "arn:aws:s3:::YOUR-BUCKET-NAME/*"
            ]
        }
    ]
}
This Bucket Policy grants public read access to your S3 bucket. The only thing you will have to do is replace where it says ‘YOUR-BUCKET-NAME’ with your full bucket name, and the click save.
Now we are going to test our endpoint!
Refer back to the endpoint you made a note of earlier in this process. (if you have lost I, go to your bucket, click on properties, and scroll down to the bottom, and under ‘Static Website hosting’ you will see your endpoint).
Simply copy and paste your endpoint into your favorite browser, and you should see your website!
If you don’t see your webpage, you might have made one of these mistakes:
- Check you have spelled ‘index.html’ correctly on the option to configure an index document when configuring the static website settings.
- Make sure you upload the correct files to your S3 bucket – if you have, try uploading the unedited Web files from GitHub to make sure that your S3 bucket has been configured correctly.
Now we have made it to the last step in our journey – applying a custom domain name!
Step 4: Configure a custom domain name and set routing policies using Route 53 (optional)
If you wanted this tutorial to exist entirely in the free tier, you could leave it there and be happy, however, it looks much more professional to have your CV sit behind a custom domain name. The downside is that it will cost roughly $10 to secure your domain name, depending on what top-level domain you use (.org, .com, .net etc).
The first thing we are going to do is use Amazon Route 53 to purchase our own Domain Name. There are many websites and services out there which you can use to purchase your own Domain name but given the fact that we Route 53 is an AWS service, it makes sense to use it.
If you already use domain hosting services, you can also register your domain there and connect it to Route 53 or point it directly to your S3 website endpoint.
First you have to head over to the Amazon Route 53 Console in your AWS management console. In the navigation under ‘Domain’ choose ‘Registered Domains’, and then click ‘Register New Domain’. Once you have chosen a name, go ahead and purchase it. It might take a short time for it to become available, but once it is available you should be ready to carry on with the next step, which involves actually setting up the custom domain name with your S3 Static website!
Head back over to the Route 53 Management Console, and under the navigation page on the left hand side select ‘Hosted Zones’.
In the list of hosted zones, select the one that matches the domain name that you have just purchased. We are now going to create a DNS Record for the domain which includes rules as to how traffic is directed to the website.
Select ‘Create Record’ and then select ‘Switch to Wizard’.
Under the different routing options, as we are only routing to one end point, as we expect the website we make to be very simple, with not much traffic, we can use ‘Simple’ routing to effectively manage our DNS routing.
Next choose ‘Define Simple Record’ – and in the record name accept the default value (this should be the name of your hosted zone and your domain).
This is the step where we set up the connection to our S3 bucket!
In ‘Value/Route Traffic to’ choose ‘Alias to S3 website endpoint’, choose the region and select the bucket which you have uploaded the HMTL / CSS files into.
There are a few more steps to go then we are all done:
- In Record type, choose A ‐ Routes traffic to an IPv4 address and some AWS resources.
- For Evaluate target health, choose No.
- Choose ‘Define simple record‘.
Last thing to do – check your website works!
When you enter your URL into your webpage, you should have your beautiful new CV website display on screen for you!
If so, congratulations! You have done it! You now have a CV website running on Amazon S3.
If not – see which stage in the process it stopped working – did you have a functioning website up until you configured the custom domain name? Did you set up the bucket policy correctly? Did you also make sure that you enabled static website hosting correctly? Is there an error in the HTML code? Did you forget to even upload it! Have a good look at each step of the process and try to diagnose what went wrong – failing that start over and I am sure you will get the hang of it.
About the Author
This article was written by Jack Lavelle. Jack is an AWS enthusiast, with a passion for helping people pivot into a career in cloud.
Further reading on how to score my dream cloud job
Check out other articles that will help you advance your cloud career goals:
- 10 Tips on How to Enter the Cloud Computing Industry
- 5 Cloud Skills you (may) already have
- Preparing For AWS Interview Questions
Ready to Take Your Tech Career to the Next Level?
On-Demand Training: Learn at your own pace and on your own schedule.
Challenge Labs: Apply what you’ve learned in a real-world setting without the risk of incurring surprise cloud bills.
Cloud Mastery Bootcamp: Build job-ready skills with this live, immersive training that can get you certified faster than you thought possible.